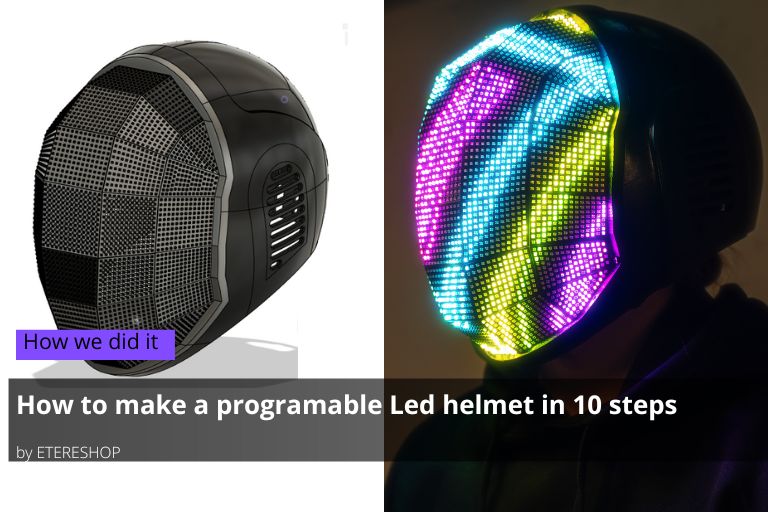
A homemade programable LED light up helmet – why not? If you are well skilled in design, 3D printing, soldering, and programming, and have all the necessary components and tools, here is a brief photo guide to creating your own programmable light up helmet.
Contents
First Step – think over a design
Our LED helmet design was based on a reference picture from our customer. Since we have already made helmets similar to this one, we used our previous designs – one for its back part and another one for the front part.
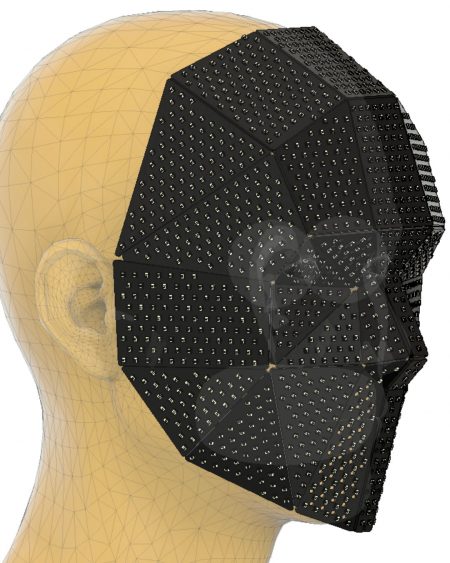
Reference photo from our client
The client asked to replace the smooth shape of the helmet with a polygonal one
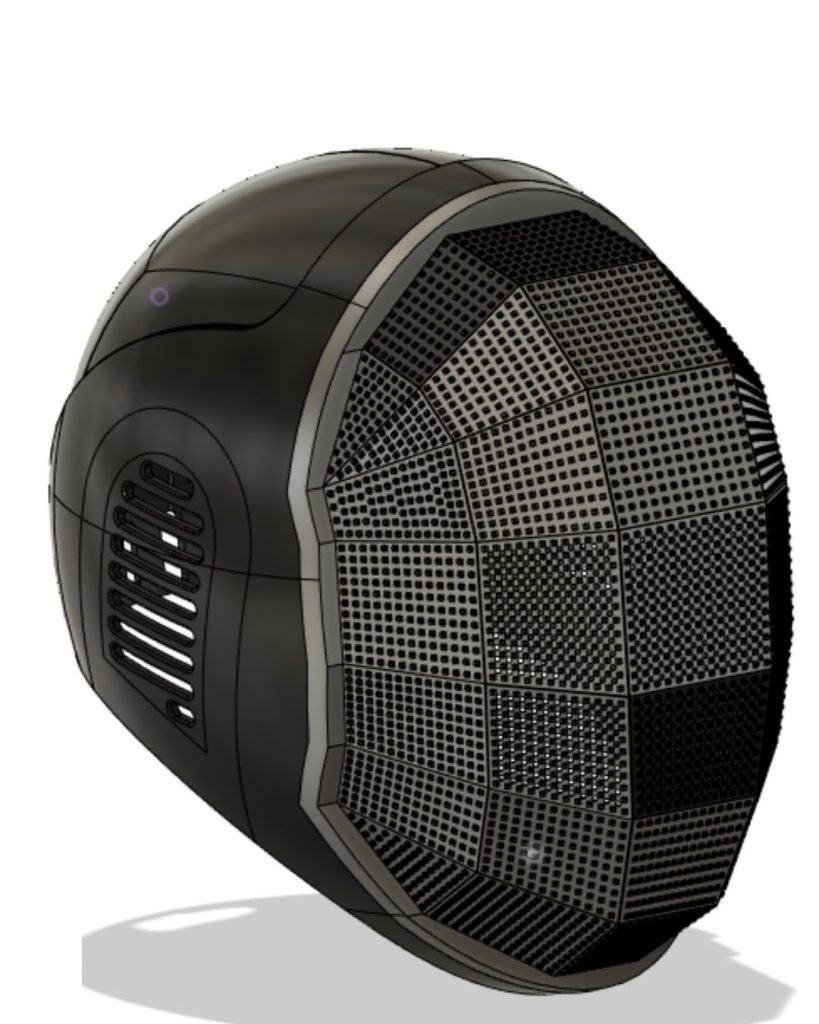
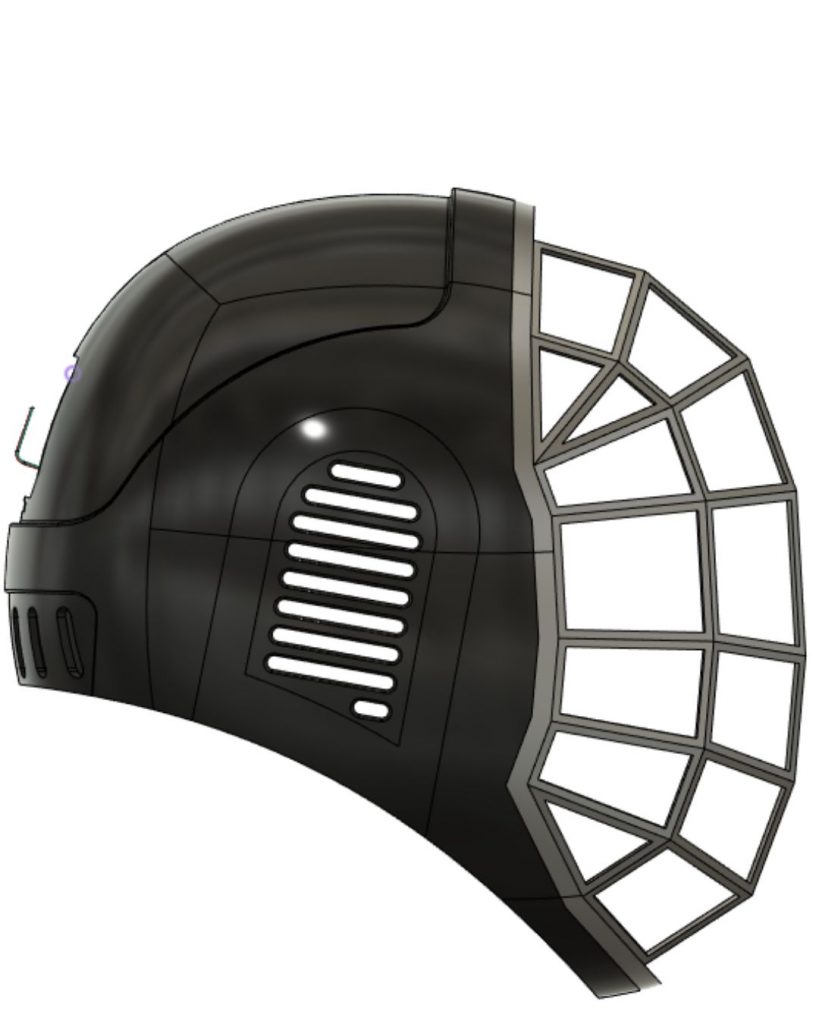
Step two – create a 3D model
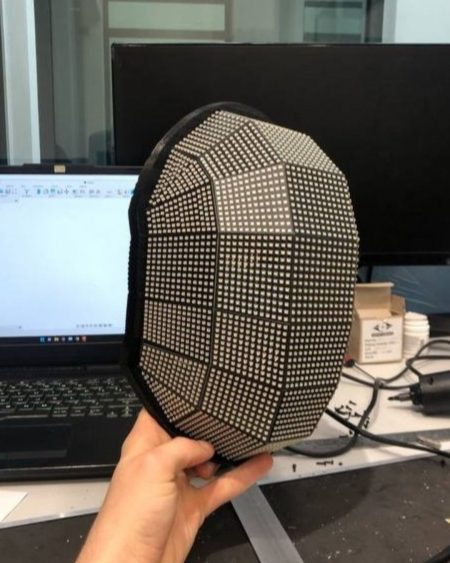
Programmable LED helmet 3D design by ETEREshop
Light up helmet 3D design by ETEREshop, side view
Third Step – prepare all the components, materials, and tools
What you will need:
A 3D printer, a 3D printer filament, holders;
A soldering furnace, an iron,a solder paste, tongs, base plates for LEDs, metal stencils,LEDs, a masking tape, and a double-sided tape;
Undercoat, primer, paint, lacquer, polishing paper 220-320-500-1000, glue;
Boxes for batteries, batteries, wires, T-plugs, 10 pin connector;
A screwdriver, a turnscrew, bolts and nuts;
EVA material for inner hat, an adjustable elastic ribbon.
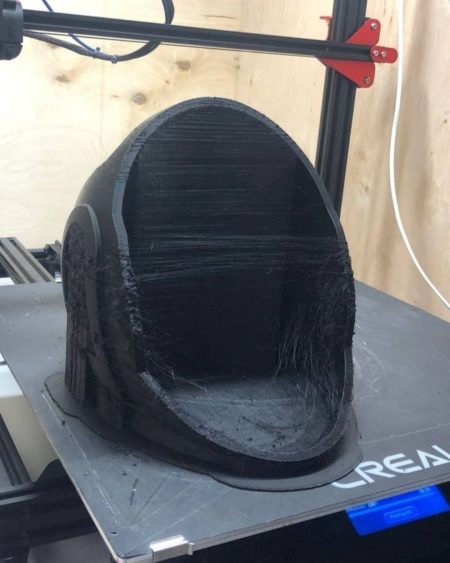
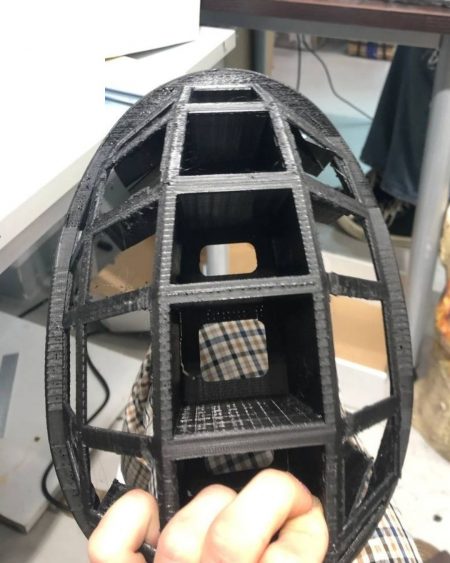
Next step – print the parts
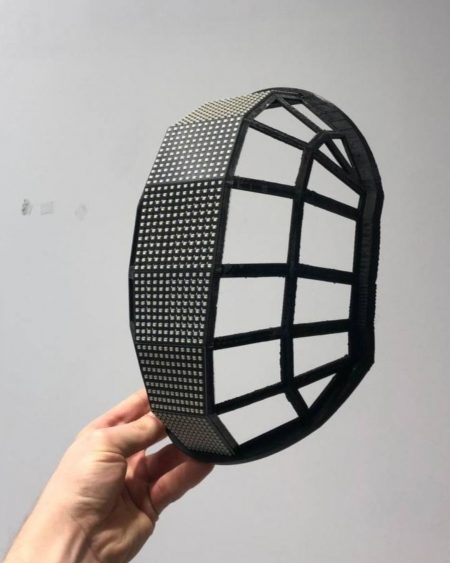
Our helmet consists of four 3D-printed parts – the back of the helmet, its front part that serves as a LED screen, and a couple of grilled covers for the ears.
3D printed back part for the light up helmet
3D printed front part of the LED helmet
For this model we used regular PLA plastic, the thickness of the layer is 0.29mm.
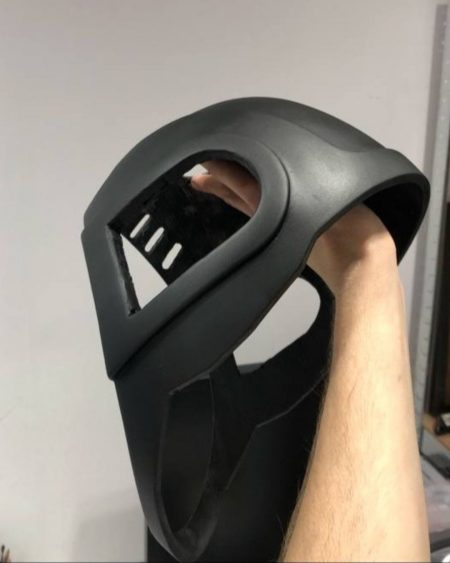
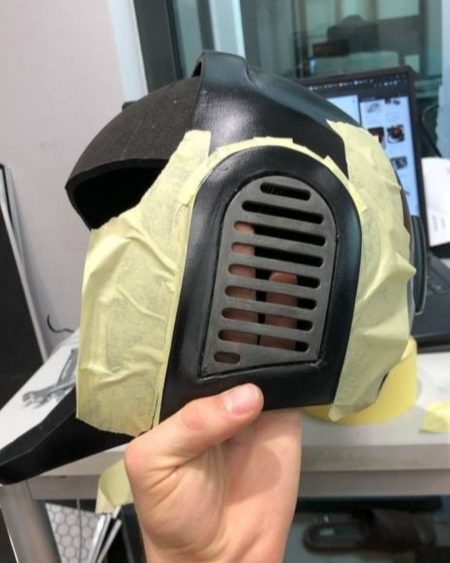
Fifth stage – polishing and applying the paint
Before applying the undercoat, cut the holes for ears, ventilation, and wires, and clean the printed helmet parts from holders. As soon as you are done with this, start polishing the parts, and then applying the primer, and paint.
Cutting the holes for ears, wires, and ventilation, in the back part of 3D printed helmet
3D printed helmet after applying the paint
Tip – make sure to set a high quality of printing, otherwise it will be pretty hard to polish the parts.
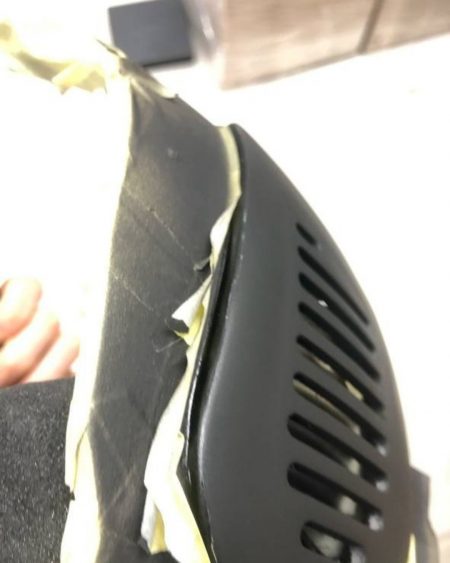
3D printed grilled cover for ears
3D printed ear cover after undercoating, polishing, priming, and painting
Glue the ear covers to the helmet base. After that cover the whole helmet with a layer of lacquer, and glue an adjustable elastic ribbon and the inner EVA hat.
Gluing the inner hat inside the helmet
Gluing elastic ribbon for fixing the helmet on the head
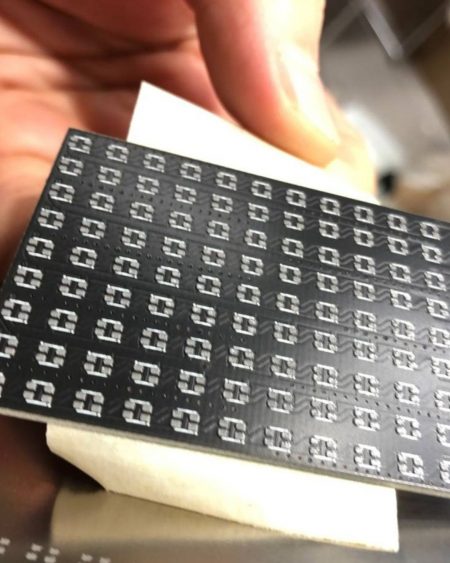
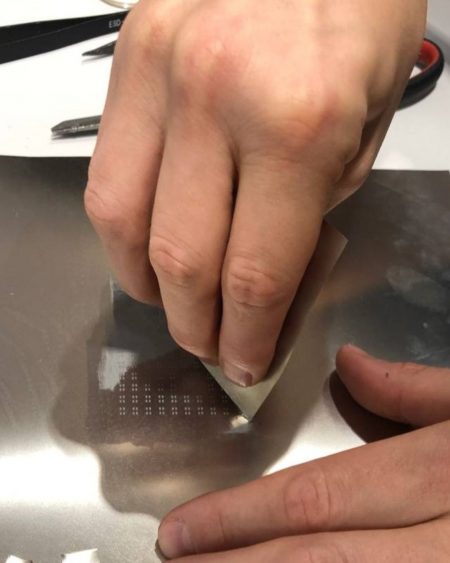
Sixth stage- prepare the base plates and solder the LEDs
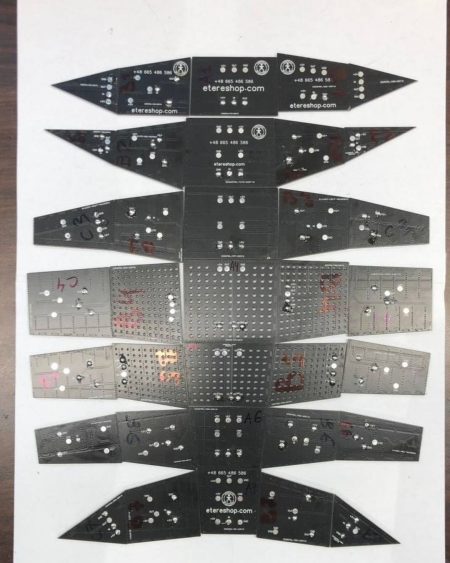
We used 35 base plates of different shapes and sizes, for which we prepared the same number of corresponding metal stencils.
Base plate for LEDs
Metal stencil application
First, put a metal stencil onto a base plate, so that all the holes fit precisely to each other, and fix everything with a masking tape. Then apply a soldering paste, lift the stencil, and put on the LEDs with a help of tongs according to the keys on the plates. For this light up helmet, we used approximately 3500 LEDs.
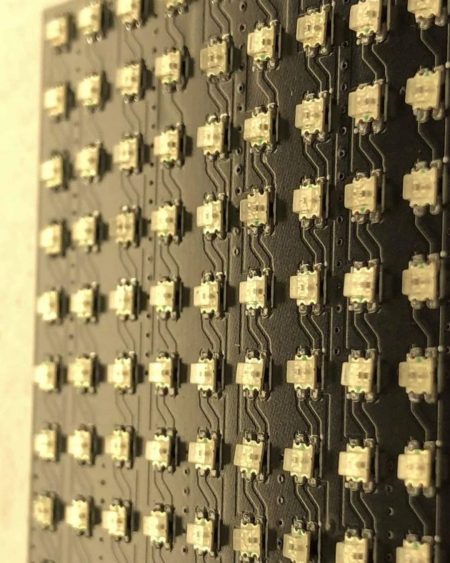
LEDs on a base plate
Now put the plate into a soldering furnace, set the temperature for 210 °C. Wait until it reaches the set temperature and hold for approx. 15sec, but not more – you can burn the LEDs.
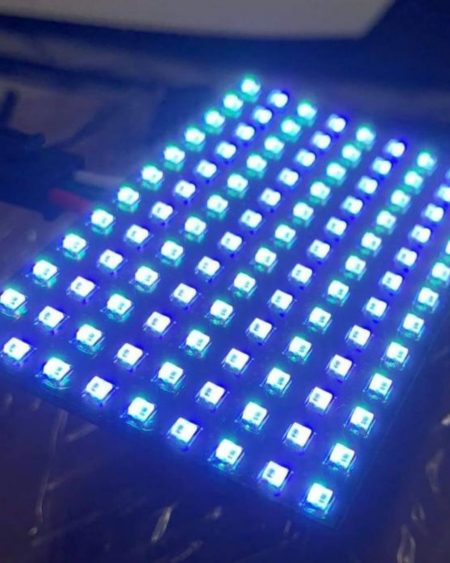
Take the plate from the furnace and turn it on to check if all the LEDs are glowing.
Checking the LEDs after soldering
If some of the LEDs haven’t been soldered, you can do it with an iron.
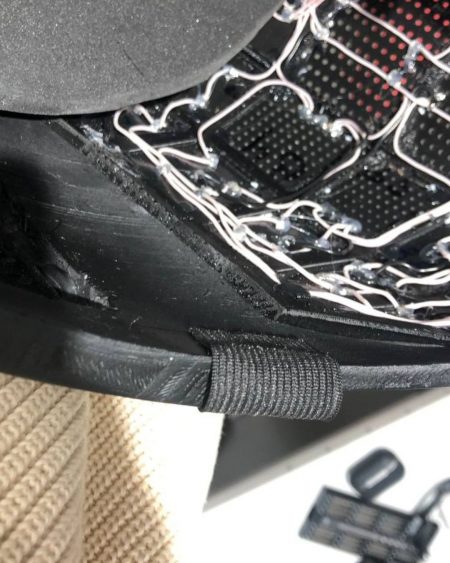
Seventh stage - LED screen assembly
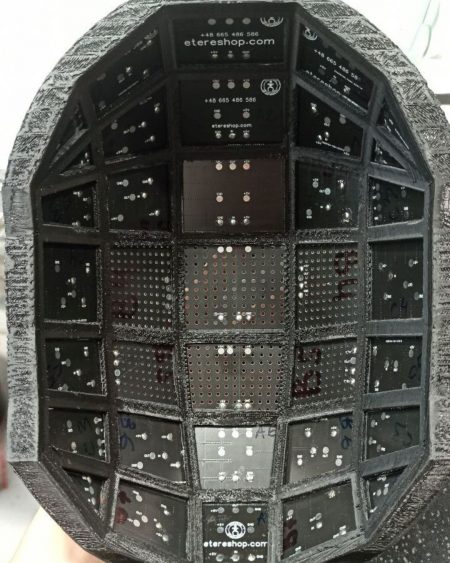
Assemble the LED plates according to their numbers and attach them to the screen and one another with a help of a double-sided tape.
Each LED plate has its own number for positioning
LED plates attached to the screen joint to joint
LED face screen assembly
Light up face screen for a LED helmet
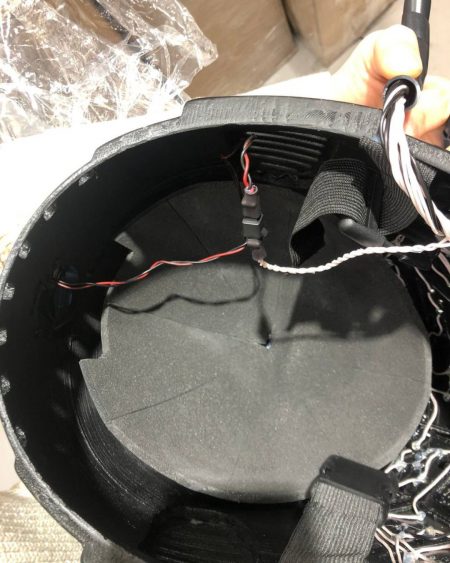
Eighth stage – wiring and connections
Soldering the common wire and applying silicone grease for sealing connections
Now solder the common wire to the LED plates, and make connections to the controller, battery boxes, T-plugs, and the switch.
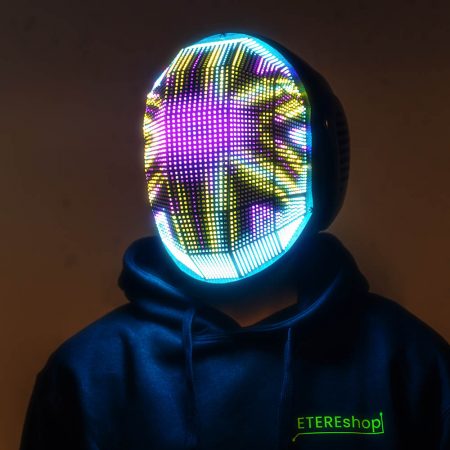
Ninth stage – create effects
Usually we use Madrix software for creating light up effects. A high density of LEDs enables to display the effects in a high quality. Most of them were made so that 80% of the whole effect is in a black color. Due to this feature, we could show the volume of animated images. There were also effects with a full coverage like aquarium, but also scrolling texts, logos, names of the brands etc. All the effects were carefully selected to make use of the helmet’s possibilities to the full.
The control is carried out with a help of buttons connected to a long wire, so you can hide it inside the sleeve and hold the switch in your hand for convenience.
Tenth stage – switch the helmet on and rock the party!
If you like the way we make our productst and interested in more programmable LED helmets and accessories by ETEREshop, tap here.
We are always striving to share valuable information with our audience, and we believe that our latest article is particularly important. We would be grateful if you could help us spread the word by sharing it with your friends and followers.