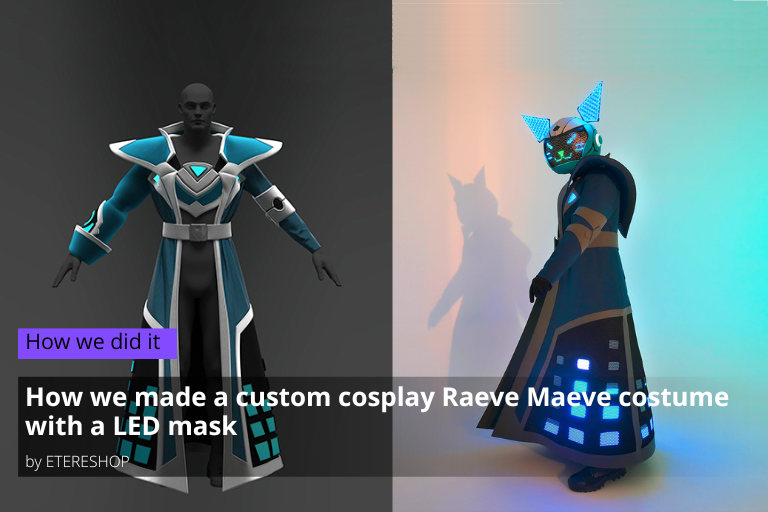
Custom cosplay Raeve Maeve costume – the story behind the creation of our one-of-a-kind outfit for the 2022 Comic-Con festival! In this article, we’ll take you on a journey from the initial ideas and sketches to the final implementation and manufacturing process of our unique costume. Get ready to discover the behind-the-scenes secrets of how we brought this amazing creation to life!
And if you have no ideas of what to wear for the next great party – just read this article – it will help you to understand that we can create any costume you like.
Contents
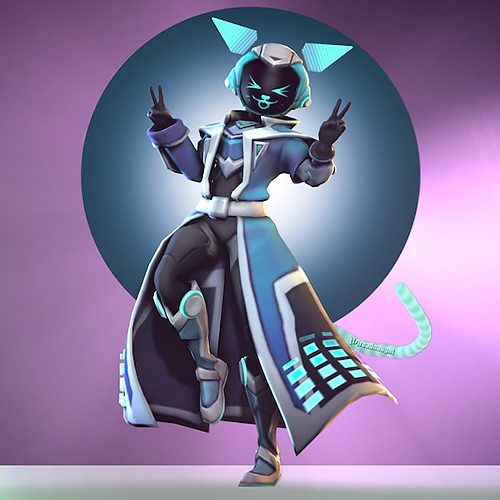
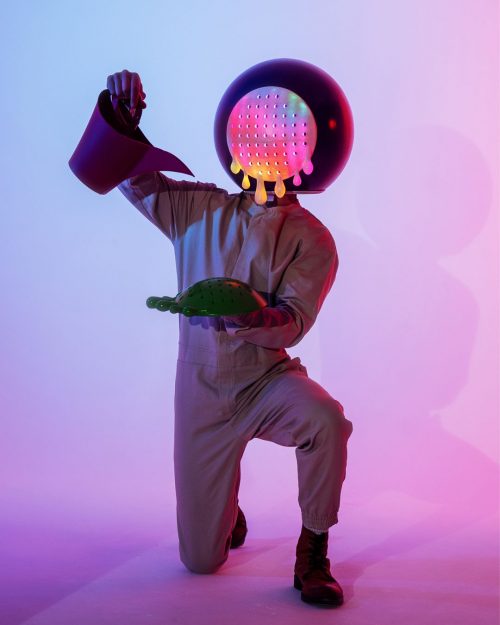
Custom Cosplay Raeve Maeve costume with a LED mask for Comic-Con festival 2022
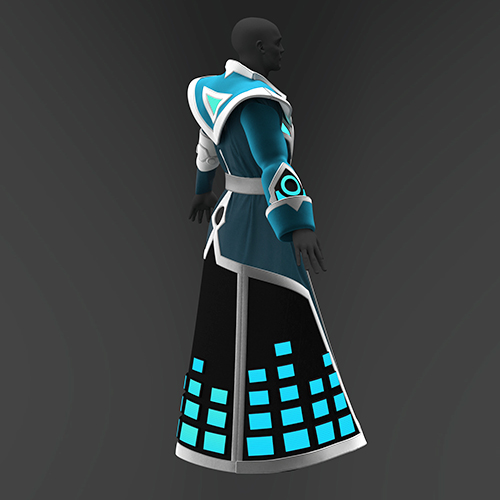
The client wanted to create Rave Maeve hero from the online game Paladins for the Comic-Con International festival in San Diego, but he failed to find a company to take on the job. The main tasks were to create a helmet, a cloak and a breastplate. The costume must be exactly the same as the appearance of the character. According to the videos from the game, some elements of the costume should be highlighted and display certain effects, and the helmet should have a LED panel that displays a face with different emotions.
Sketch of the hero Custom cosplay Rave Maeve costume from the online game Paladins
As soon as ETEREshop heard about this crazy idea of making cosplay costume of Raeve Maeve , we were highly interested and immediately took the case. The challenge was to create three interesting elements of the costume with smart elements: – a cloak with with an equalizer effect – a helmet with a LED panel that displays a face with different emotions. Also, the screen on the face had to respond to the voice -a cosplay breastplate like the original one.
Sketching and choosing materials for the helmet and the cloak by ETEREshop
Sketch of the custom cosplay Raeva Maeva LED helmet
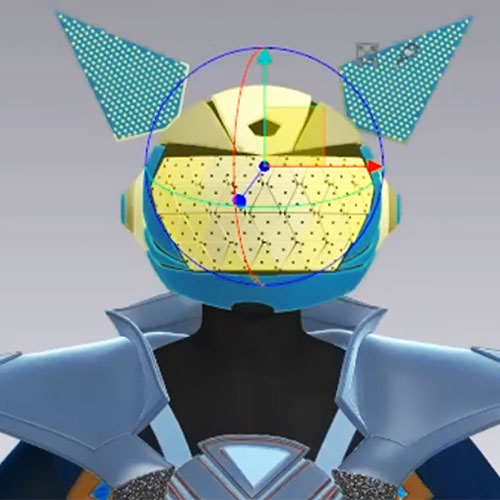
According to the client’s requirements, the helmet had to have clear shapes, colors and parameters, as well as withstand minor loads. The ears should glow, the face should be a screen.
The helmet was designed in Autodesk Fusion360, all the nuances and appearance were worked out.
As for cloak sketching there was no such a stage before. The customer presented photos and videos of the character, according to which everything had to be developed, so we immediately started modeling the costume in 3D.
The process of creating a sketch of a custom cosplay Rave Maeve LED helmet
Sketch of the custom cosplay Rave Maeve LED helmet
The smart cosplay helmet was designed in Autodesk Fusion360.
Sketch of the LED custom costume
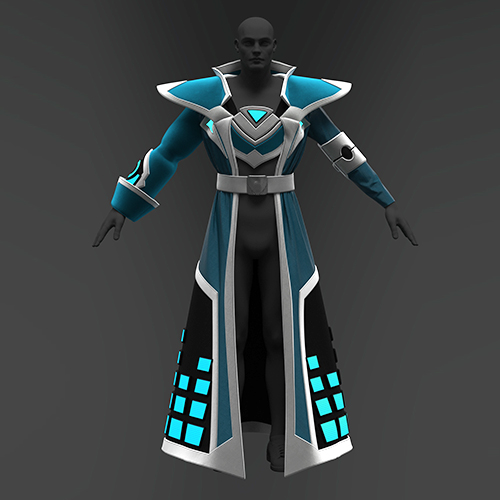
The cloak was built in CLO 3D based on the customer’s measurements as well as the character’s appearance. The main difficulties were that the cloak was of a rather complex shape and the elements of it were not inherent for an ordinary cloak. Our specialists had to think through all these nuances in advance, before the cloak itself was implemented. In addition, LED-panels had to be used in the cloak, which also needed to be taken into account.
The bib (breastplate) is a separate part that is simply put on, but it also needs to glow, so the place for the LED-panel also needs to be taken into account.
Sketch of the long cloak of the character Rave Maeve
Sketch from the side of the long cloak of the character Rave Maeve
Prototypes of the LED helmet and the LED cloak
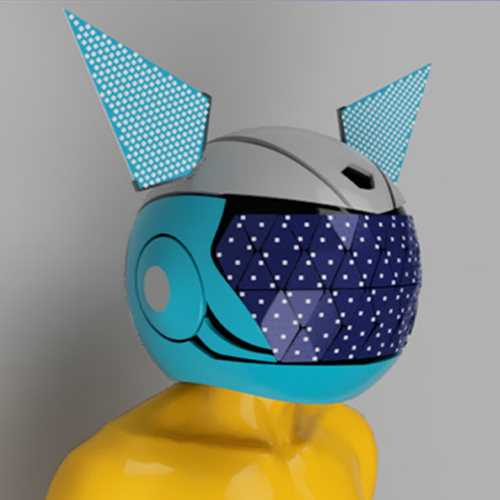
Due to the client’s parameters, we made the base of the helmet. We decided to make the ears and the screen from LED-panels. The ears are triangles, so the panel needs to be shaped. In order to fix the panel on the helmet, we developed a fastener into which the panel will be inserted, and the fastener will be inside the helmet.
The face was produced out of LED-panels as well. We chose the optimal size and modeled the LED-panels, which were subsequently laid out in 3D model so that it looked neat and flat.
After the model was completed, we sent it to the customer for approval. After minor changes and the client’s approval, we went to drawings, models and panels.
The helmet itself was divided into several layers and flattened using the Pepakura program. After that they were given to contractors for cutting. Fasteners and all plastic parts are corrected and sent for 3D printing. The LED-panels were bred in the Easy EDA program.
See how we created a custom-made raeva maeva helmet
See how we created a custom-made Raeve Maeve character cloak
After building a 3D model and agreeing it with the customer, the model is disassembled into molds and given for sewing, and the boards and their dimensions are given for wiring and ordering.
Choice of the materials
We decided to make the helmet out of cosplay eva foam, because it is easy to process. Besides, eva foam keeps its shape when exposed to it. Due to the fact that it is quite dense, it lends itself better to coloring and you can neglect the use of a primer (but later it turned out that it is better not to do this)
Fasteners for the ears, as well as side round parts, were printed on a 3D printer. The rest of the decor elements from were made from ordinary eva foam with a thickness from 3 to 5 mm.
The main problem was the choice of paint for elements, because it was impossible to take the first shade that looked like a sketch. Before choosing a paint, it was necessary to find out the fabric for sewing a cloak, because the helmet and cloak must be in harmony and have the same shade. After a long search, we found a suitable fabric in turquoise color, suitable in shade and texture, after which we began to look for paint based on it. Another key point in the choice of paint was that not every paint in its composition and properties was suitable for our task, and in addition, the limited range of colors made our task more difficult. But after a long search, we found the paint for graffiti and it perfectly matched the shade and properties for our task.
The Production Process
Look at how the LED helmet was created
Soldering of LED panels with diodes to connectors
All LED elements were made from ready-made boards that we ordered. These boards have a sufficiently high density, i.e. a large number of diodes, so you need to correctly calculate the power supply, select power sources and their number.
We decided to use 20 lithium-ion batteries (18650 3.7V 20A). We use boxes for 2 batteries each, which gives us 10 boxes in total.
At the request of the client, it was important to be able to quickly recharge the batteries, so we divided them into 2 sets of 5 boxes. We also picked up a 2-channel charger for it, which gives out 10A per charge for each channel, which allows you to charge the entire set in about 3 hours
Transfer molds to fabric
CLO 3D allows to make molds from a finished 3D model and export them to a format convenient for printing, after which the printed molds are transferred to the fabric without any problems.
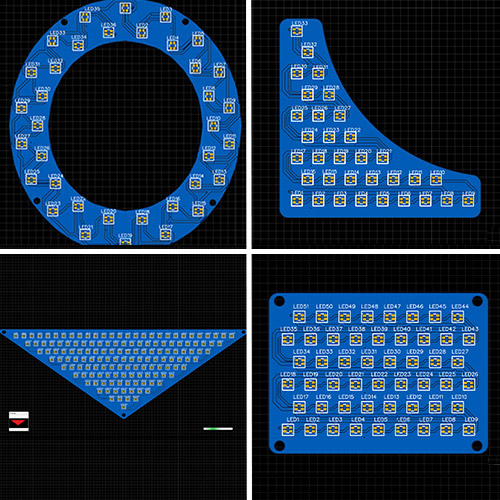
Creation of boards for a cloak of various shapes
LED circuit panels let the cosplay costume glow.
The LED-panels make the costume light up the way the customer wants it to. Using such a ready-made solution is much more elegant and requires less human resources in production. In addition, the density of the diodes allows to output more complex and interesting effects in hd format, which a regular tape cannot afford. There are several LED-panels on the cloak. The main part is located at the bottom in the shape of rectangles slightly different in size. Several elements on the sleeves of a more complex shape, and a triangle on the back.
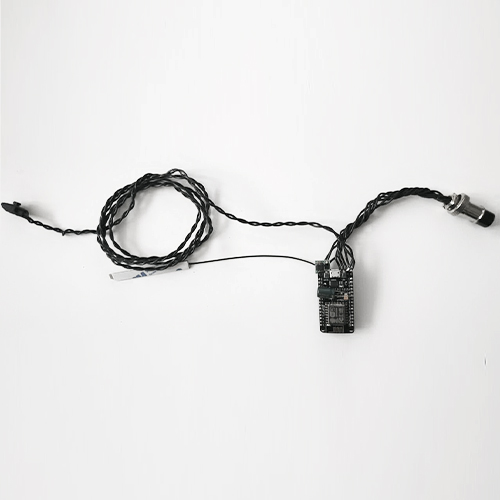
Controllers’ soldering
Controller for Raeve Maeve LED Suit
We used 2 controllers for this costume: one for the face, and one for the cape and ears.
The face controller must have a microphone in order for the face animation to respond to voice. The second controller is responsible for the effects of the rest of the suit. Belt controllers are also soldered without fail, so that in the event of a breakdown, the main ones can be quickly changed to a spare (additional) controller.
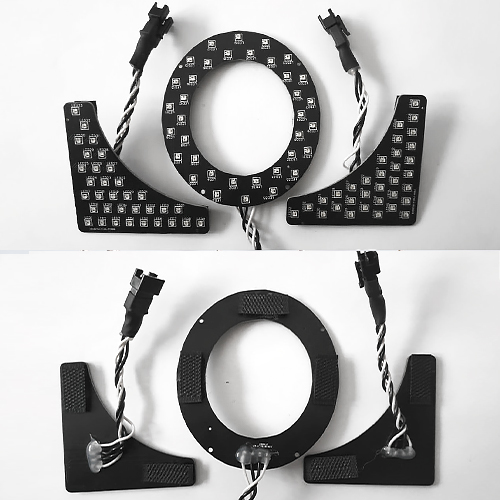
LED panels soldering
Led panels with soldered wired or connectors
We order led panels with soldered diodes and tracks so that we can solder wires or connectors to them. All our products are designed in such a way that they can be quickly and easily repaired. So instead of soldering boards directly, we solder connectors, which will allow us to quickly replace a non-working element in case of any malfunction. The only place where the led panels were soldered with wires is the face, because led panels are placed there tightly, and the connectors would look very rough and sloppy as well as block the entire view.
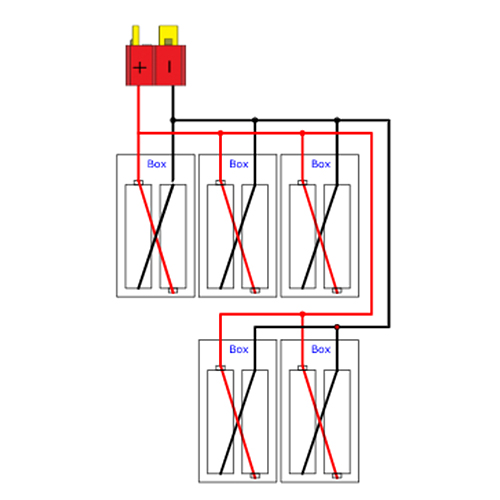
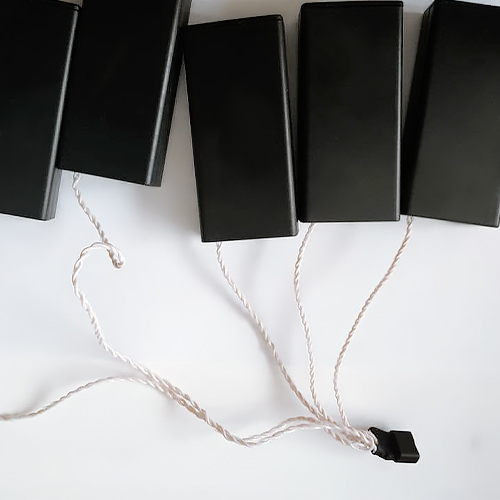
Boxes soldering
A wiring diagram for battery boxes
Ready battery boxes
We receive ready-made boxes, but they are made in such a way that the batteries are connected in series there, which gives us 7.4V instead of the required 3.7, so we need to change them so that the batteries are connected there in parallel. For the customer convenience the boxes should be paralleled with each other, so that instead of 10 connectors from each box, we connect only 2 (in our case, we make 2 sets of 5 boxes each). While soldering the boxes, you need to consider where they are located on the suit to choose the correct length of the wire with the connector.
Costume assembly
Inserting LED panels into the custom cosplay Raeve Maeve costume
There are special pockets in the cloak for the led panels into which the panels are simply inserted. The main thing is not to confuse the size of the led psnels and their appearance, because the boards are mirrored, say, on the right and left sleeves. As for the helmet, things were much more complicated. The ears were inserted into specially printed forms. But there were a lot of problems with the face. First of all, the face had a complex shape, had a round bend in two planes at once, and the boards are flat and have a triangular shape. Another problem that we encountered was how to fasten the boards together. The small size of the led panels made it impossible to make more holes into which a coupler could be inserted and thus fasten the led panels to each other. The first thing we tried was to use a thin wire, but in the process of using it we realized that it was not suitable, because it scratched the panels and subsequently led to a short circuit. Therefore, it was decided to replace the wire with fishing line and fasten the led panels with it.
LED Helmet and LED cloak synchronization
Synchronization of the led cloak and led helmet is implemented using a radio on each controller. Regardless of which controller the button is pressed on, the effects will change on both. The whole project was made in the MADRIX project, effects were also created there, which are converted into a data file that the controller can read using the grabber program developed by our company. An exception are effects with face animation. The face animation was made using our firmware and controller capabilities, and it is just reading of pre-drawn pictures in a row, which are recorded on a USB flash drive in a certain folder.
Kinds of effect LED custom cosplay Raeve Maeve costume
Now this suit pleases its owner. And if you are thinking about development and tailoring of a unique suit to order, take a look at our team of professionals. We take work of any complexity, use the most modern materials and complete the cosplay costume on time.