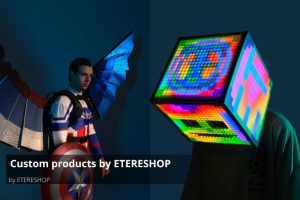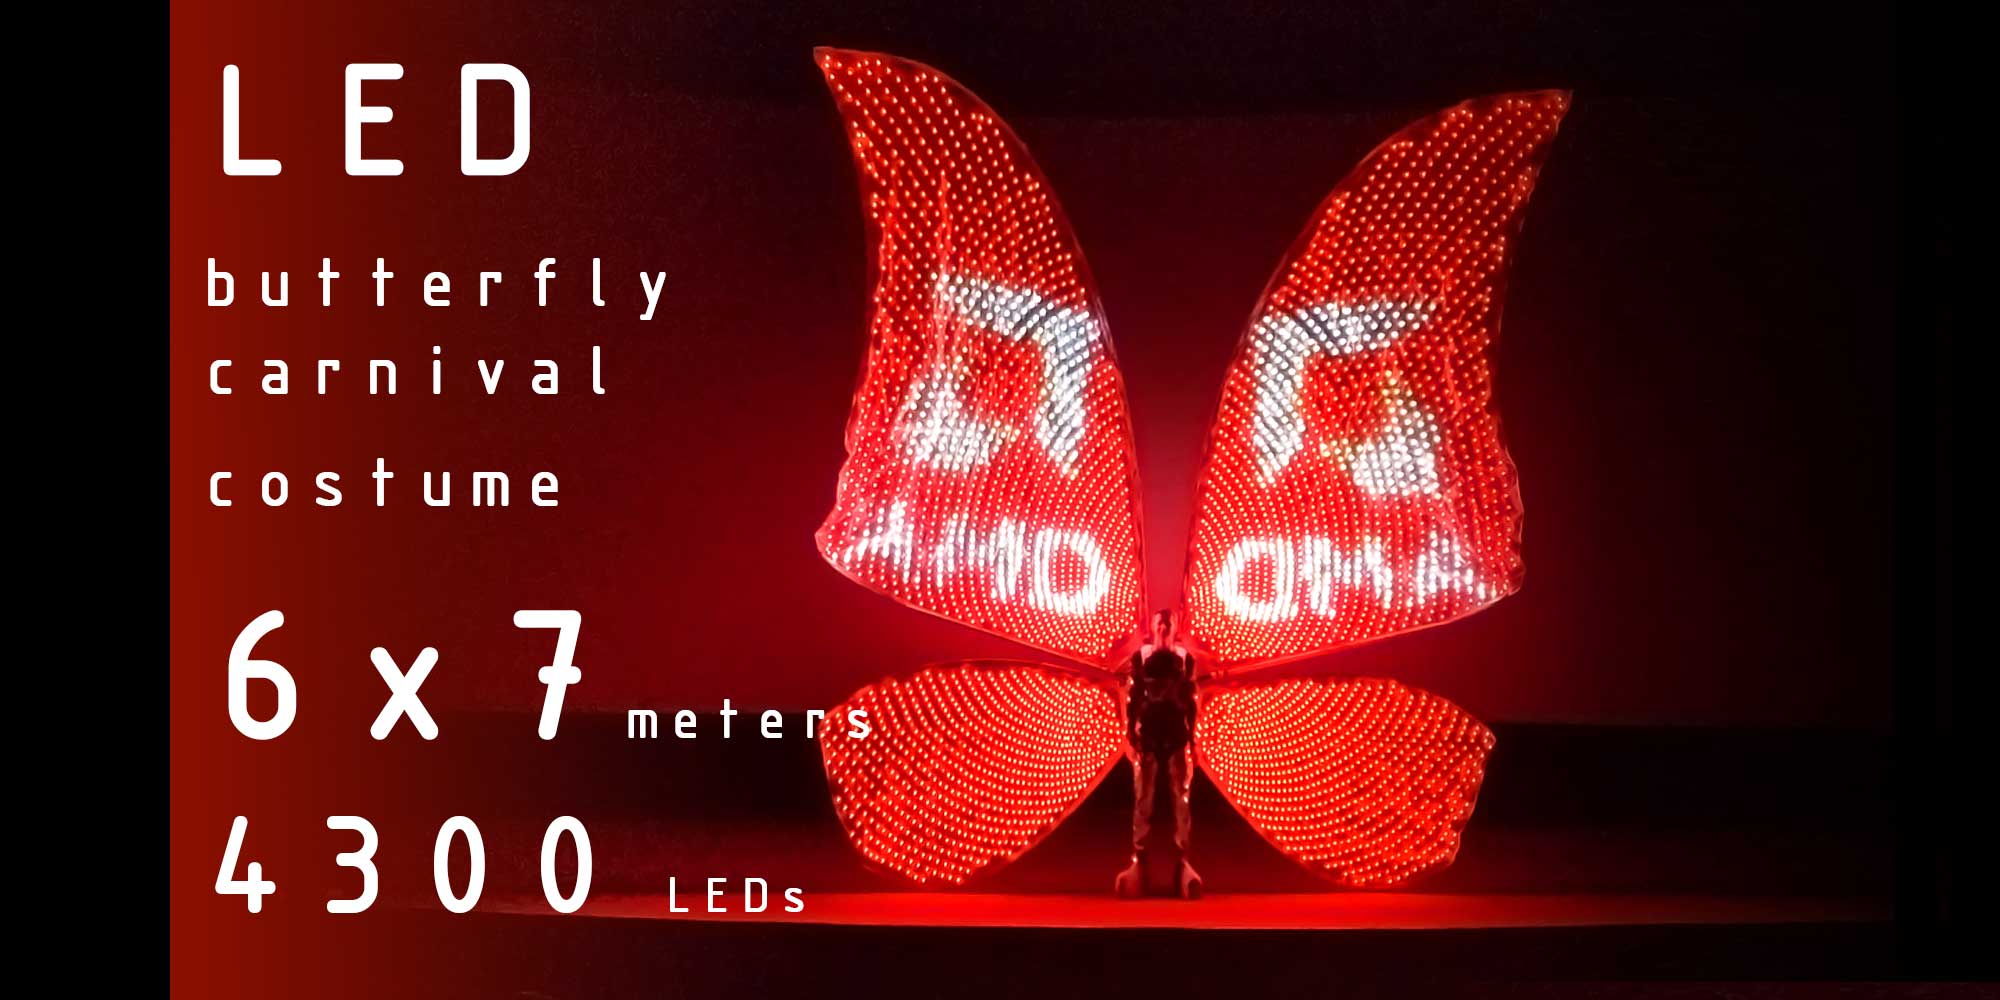
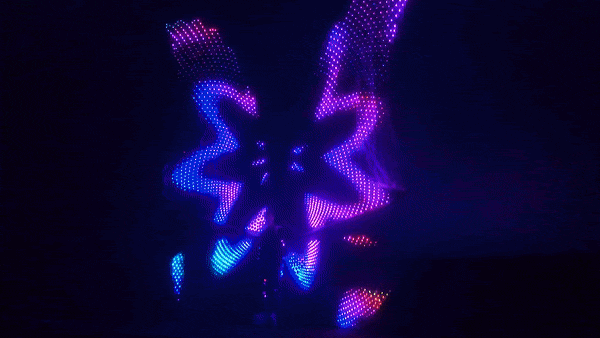
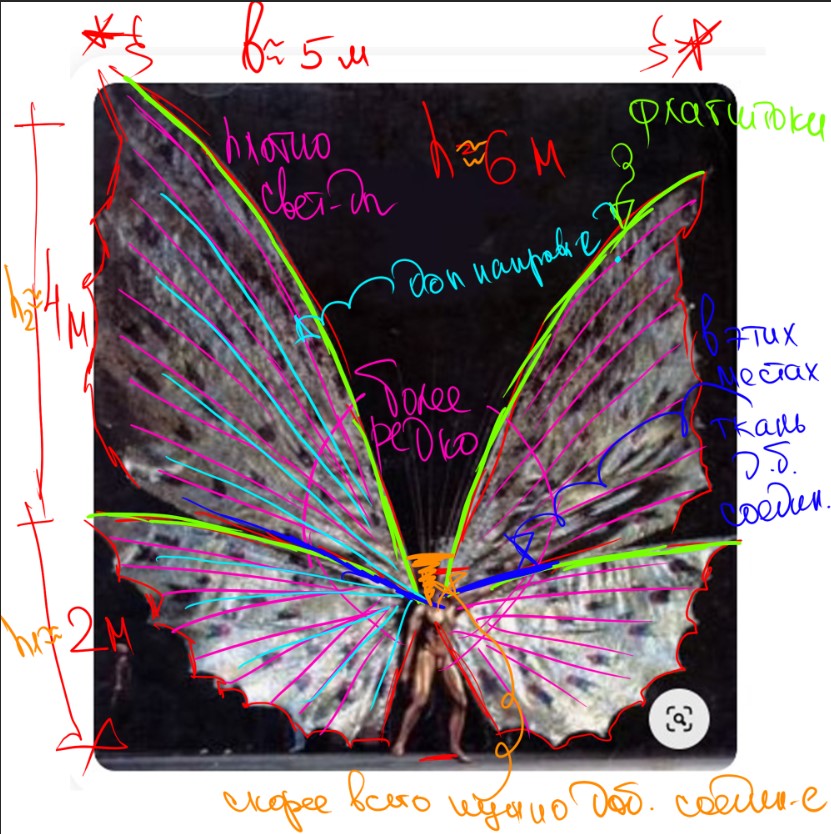
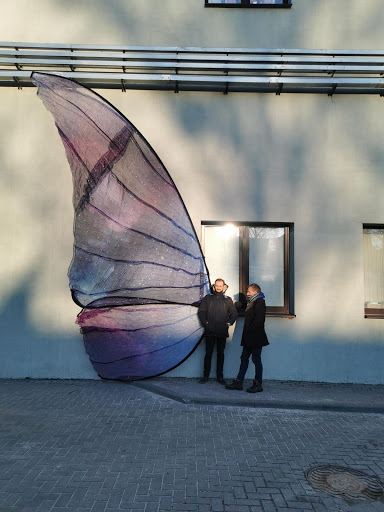
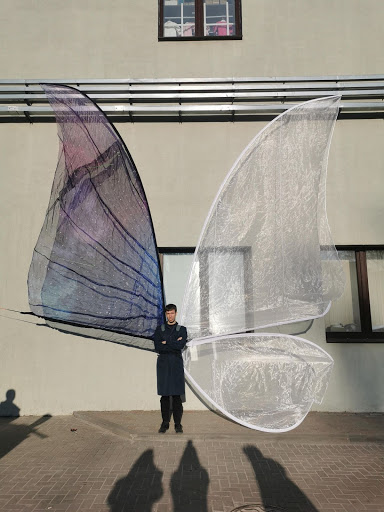
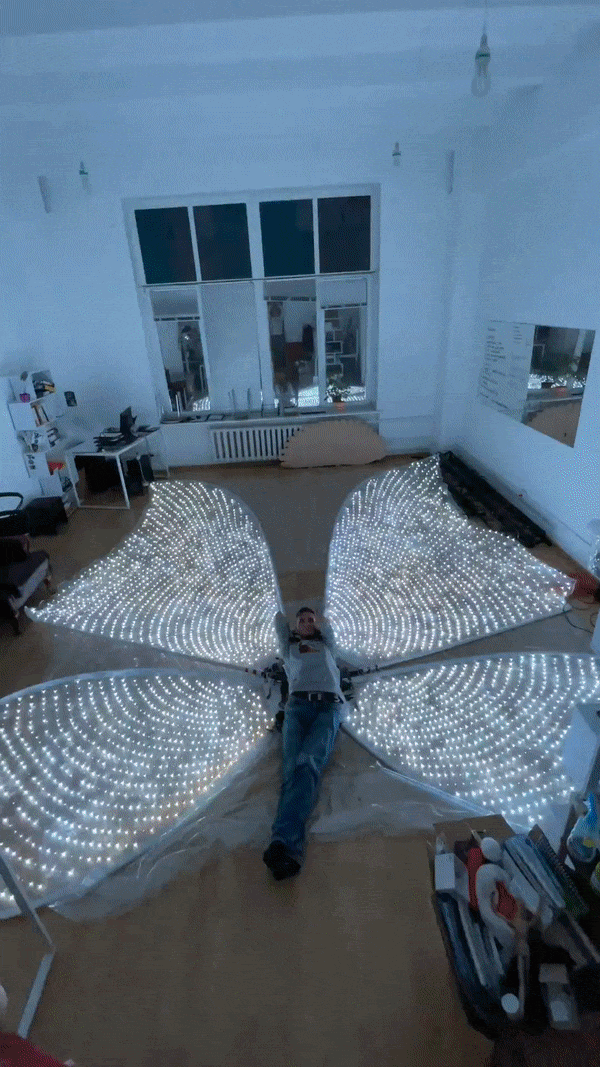
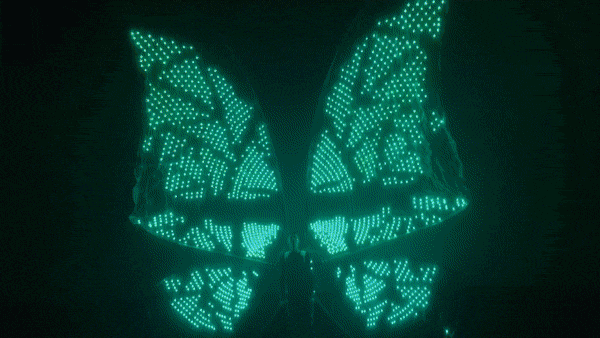
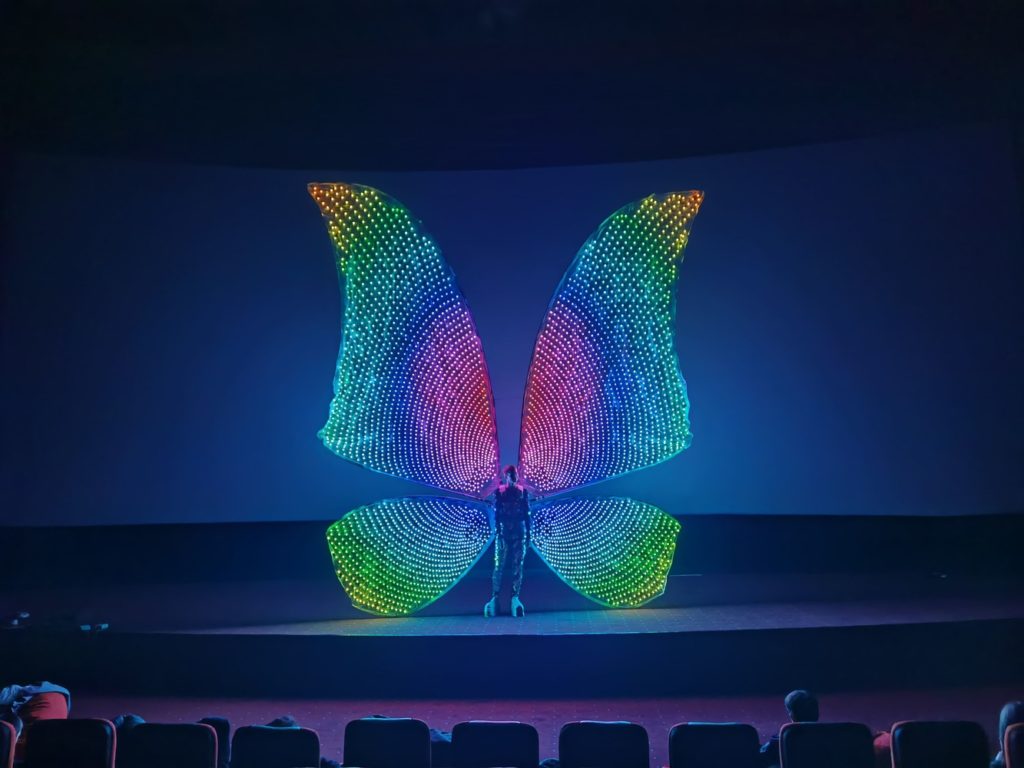
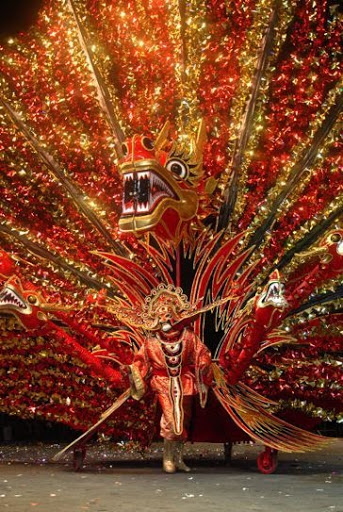
Getting ready for carnivals? We have created the largest butterfly carnival costume in the company history. These are two huge wings 6×6.5 meters, representing a screen of controlled LEDs on which you can display any kind of image and logo. Our development is perfect for carnivals, sports and entertaining events on large platforms.
Content:
- Project history
- How was the work on the project going?
- What programs does work with the suit?
- How is the costume constructing?
- How do the effects work?
- Specifications

Project history
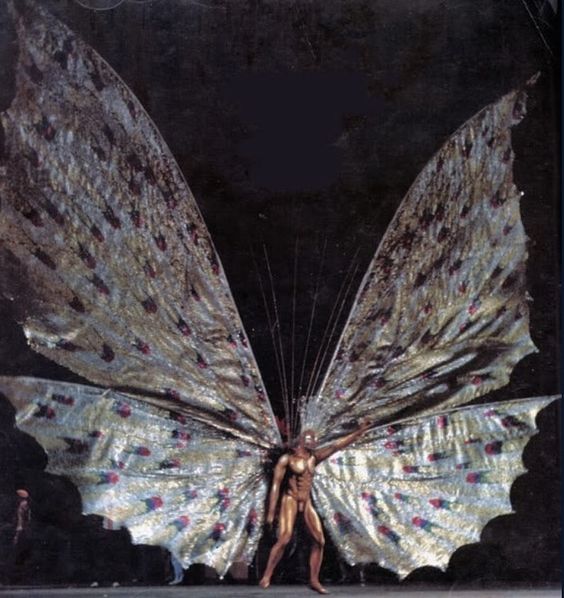
The costume was inspired by the carnivals in Trinidad and Tobago, namely the image of the king of the carnival in 1982. That year, it was the artist Peter Samuel, who later became the king of the carnival 8 times.
The Papillon costume was created by artist Peter Minshall. The image symbolized the ephemeral side of nature. It took only a week to create the costume, and Peter Samuel himself recollected that even his own parents did not recognize him in that costime.

The Trinidad and Tobago Festival is the world’s oldest carnival. In terms of scope, it competes on an equal with the festival in Brazil. Carnival on the island country influenced even European culture. Due to it, England began to hold an Afro-Caribbean festival in London’s Notting Hill.
How was the work on the project going?
In our company we are always in search of new ideas: we improve old products, develop new ones. Right now we are engaged in two authoring developments: a VR showroom and an LED butterfly costume.
In 2019-2020, we designed and experimented with carnival peacock wings made from LEDs. They represented a huge screen on which any kind of image or logo could be displayed.
We decided to develop the concept of a large screen: we used new LEDs, due to which the price was reduced. We went even further and decided to change the shape of the suit. We brainstormed and in the end created a board on Pinterest, where ideas were collected.
One of these ideas was the carnival costume of a butterfly. We stopped at this idea: the suit is flat, which means that logos will look good on it. The close and detailed work on the product began at the end of 2020.
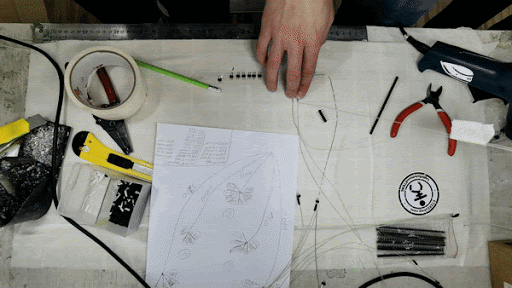
First, the designer laid out the project: the stages of work, the time required to complete them and the list of materials. The biggest challenge was attaching somehow the wings to the back.
What was needed was a structure that could not only support the product on itself, but also become comfortable for a person wearing it. We came up with three options for a backpack from a metal base.
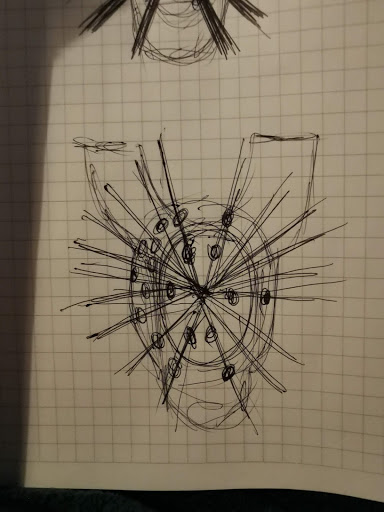
First sketches of backpacks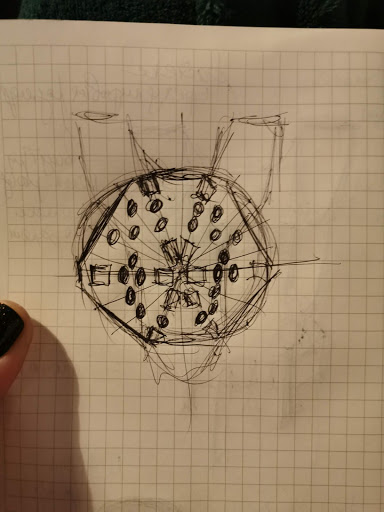
First sketches of backpacks
First sketches of backpacks
After that, we brainstormed and chose the best option. We began to think it over in details and look for materials. We came up with fixers and fasteners that will hold the base of the suit.
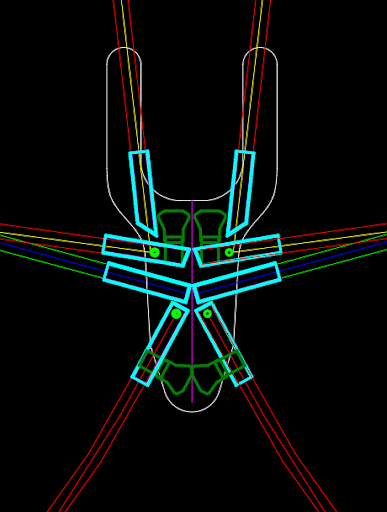
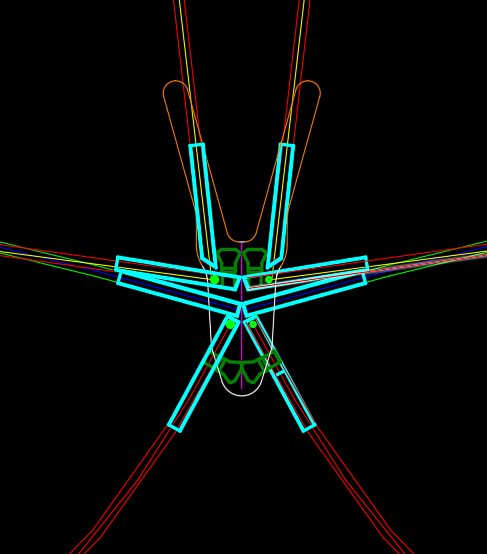
After that we started to create drawings in Autodesk AutoCAD. First, they chose their own shape for the wings and matched it with the height of the person. Further, they began to work out its possible modifications. As a result, we developed three options for guide wings, chose their shape and size.
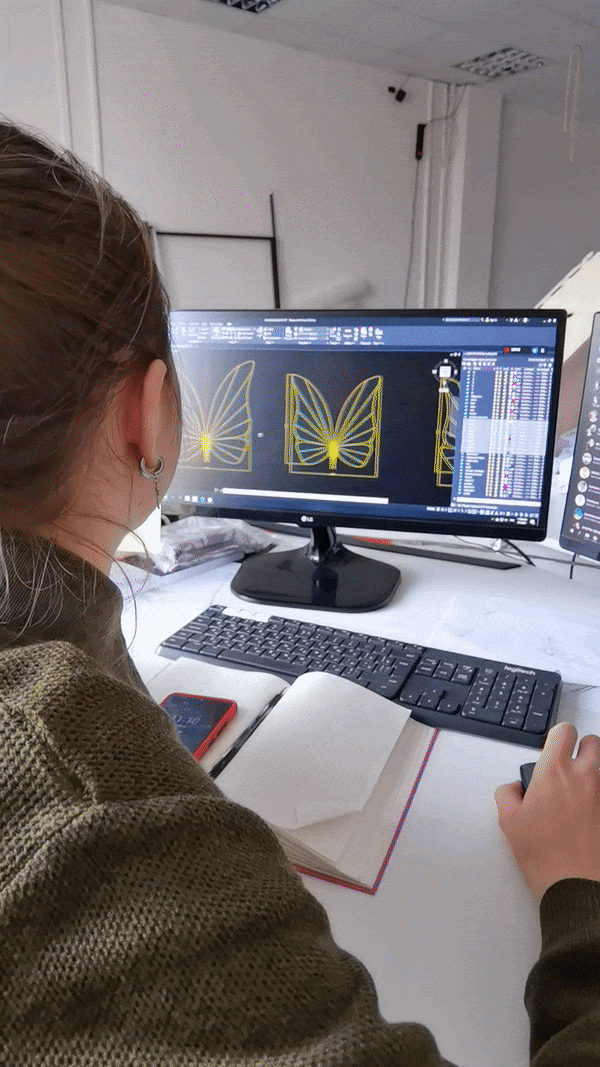
Designing different wing shapes 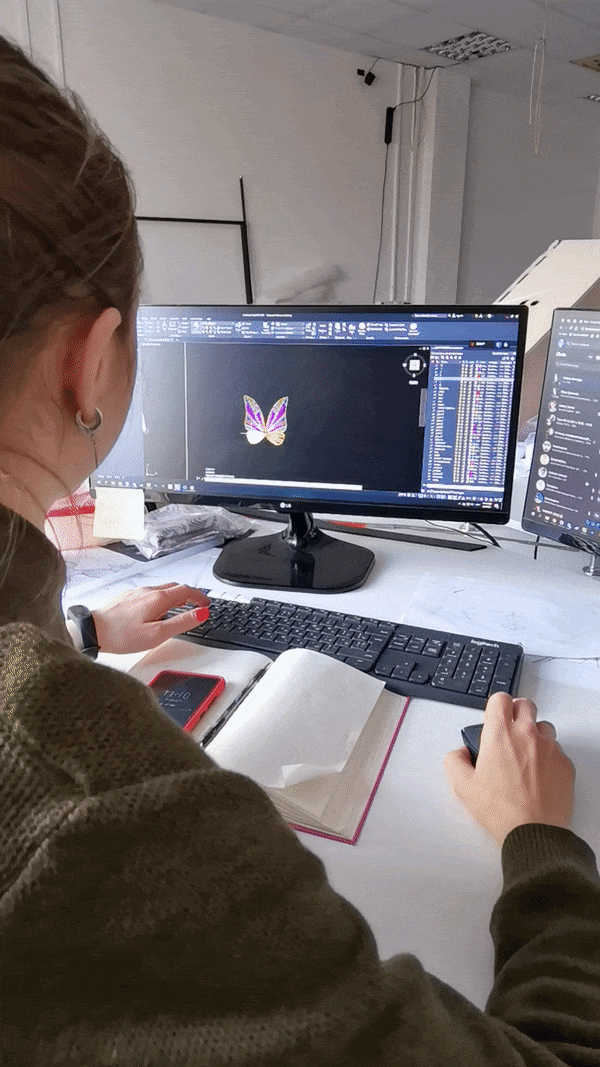
Comparing the shape of the wings
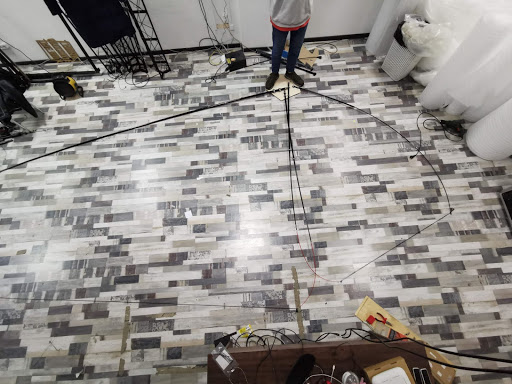
We used fishing rods to shape the wings
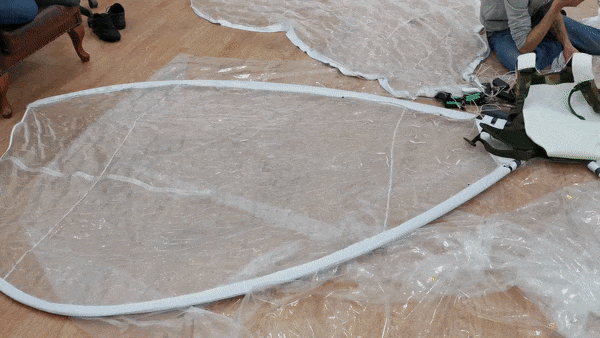
We used fishing rods to shape the wings. To understand what the prototype of the future suit would look like, they were pulled together with a cable. With the help of it, we achieved the desired shape.
Forming the basis 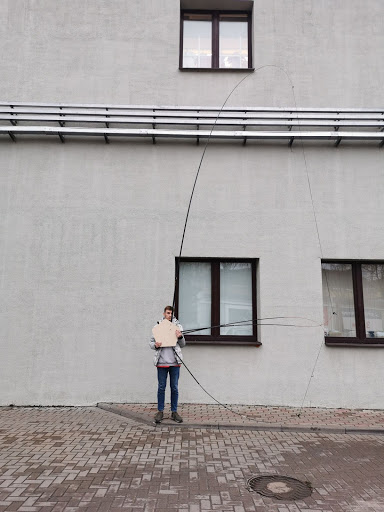
The rods were pulled together
Based on the drawing, we drew the basis for the backpack, printed it on a 1:1 scale and gave it to the contractor to work out. In parallel with this, we experimented with fishing rods in order to achieve the desired shape and angles of the product.
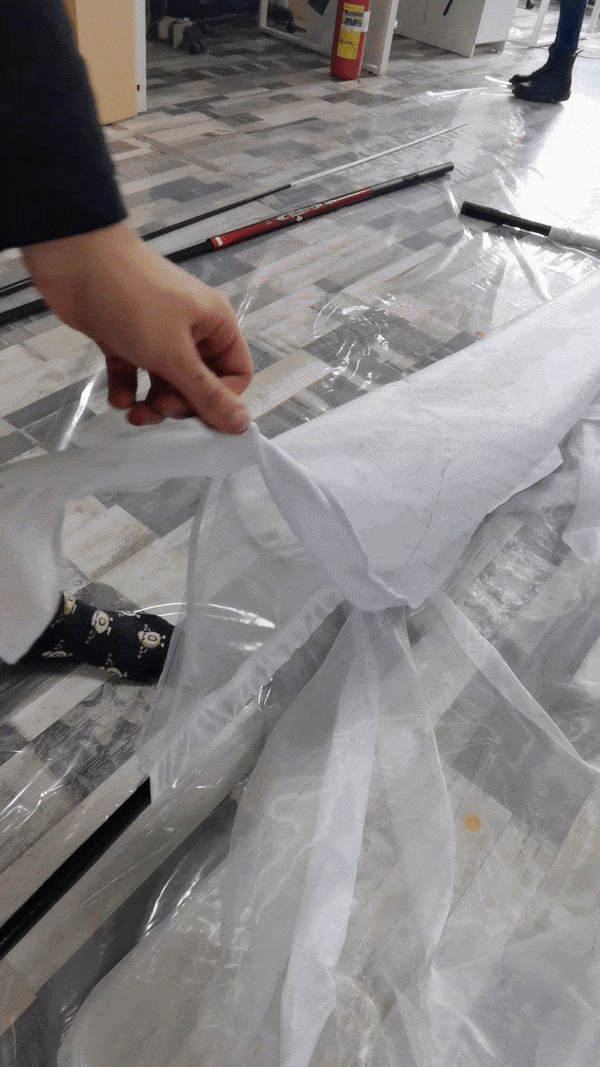
As soon as we got the right shape, we made a drawing of paper patterns for the wings and printed them out. According to them, our sewing department from the remnants of the material sewed the first prototype of the right half of the wings.
An interesting story happened with the fabric: we got it from a client who incorrectly connected the power to the wing of the peacock costume, set it on fire and sent it back to us.
When everything was ready, the prototype was measured along with the backpack. It turned out unsuccessfully: the wings sagged, the fishing rods broke, the product lost its shape. We bought new strong fishing rods and everything worked out. We started drawing the layout of the LEDs.
Fitting a prototype wing 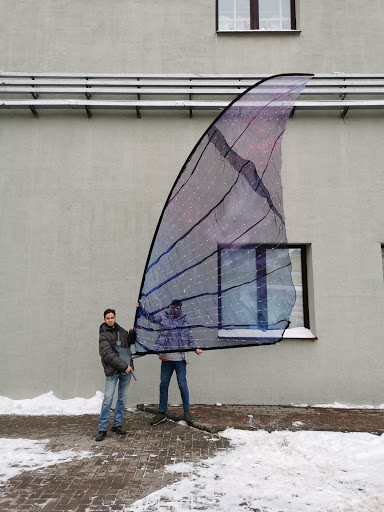
We achieve the desired wing shape 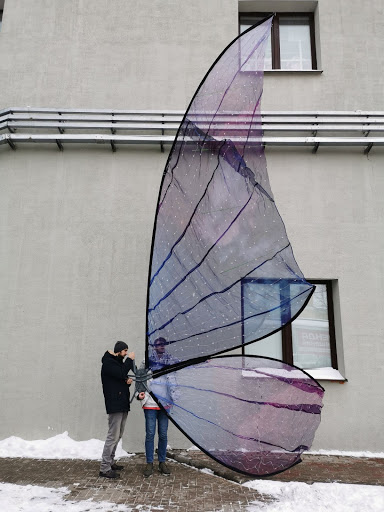
We achieve the desired wing shape
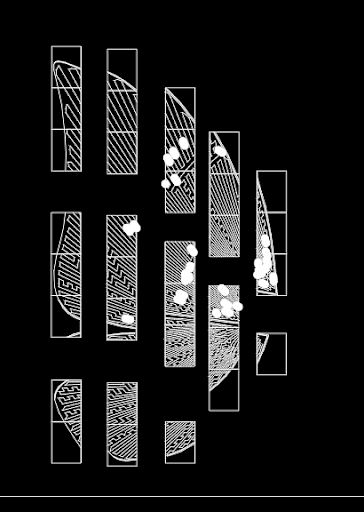
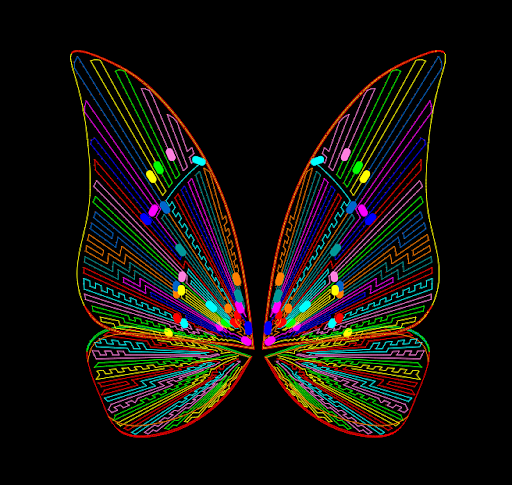
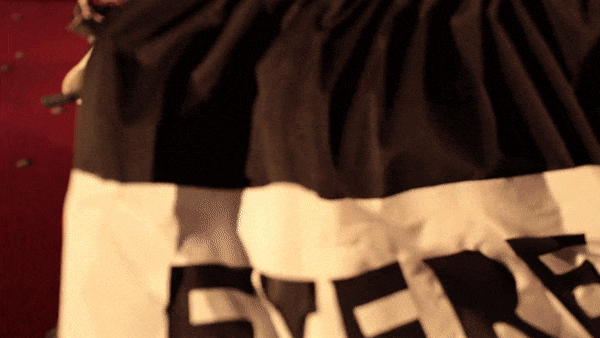
Lines with dots were made on each wing, which we then glued with the LED strip. Once the drawing was ready, it was prepared for printing on organza. In the original file, there was not only the layout of the LEDs, but also all the details for the work of the seamstresses.
First, we printed one half: to understand if everything was done correctly. After that, the seamstresses cut out all the details according to the print and sewed them into single wings. They also prepared supplex channels where fishing rods are attached. Additionally, these holes were reinforced with vinyl parts so that the supplex would not stretch when pulled.
Lines on which the LED strip is glued 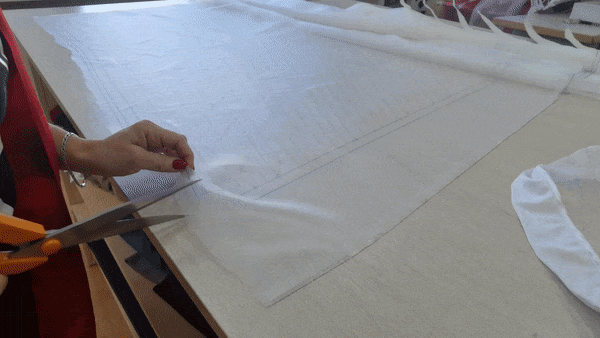
Seamstresses cut out details
We made a cover for the backpack and sewed the second half of the suit
In parallel with the sewing of half of the suit, we had to give the backpack for alteration. The first version was made of thin metal and the design of the backpack could not withstand the weight of the product. We also changed the thickness of the tubes used, where the ends of the fishing rods are placed: we changed some of them as a result of several tests.
Blueprint for a new backpack 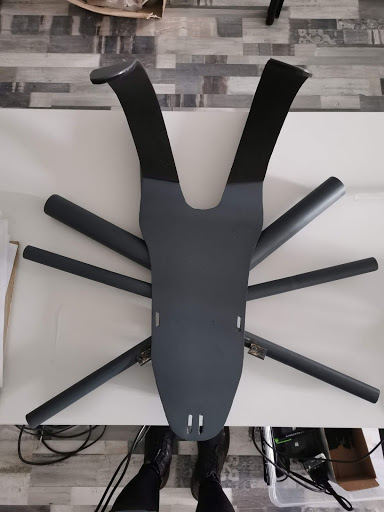
A new backpack
After half of the suit was sewn off and the backpack was altered, we tried on the product. And again we were not satisfied with the form and the fishing rods broke. We bought new, more durable ones, gave them a shape and decided to improve the base again.
Assembling the left half of the wing 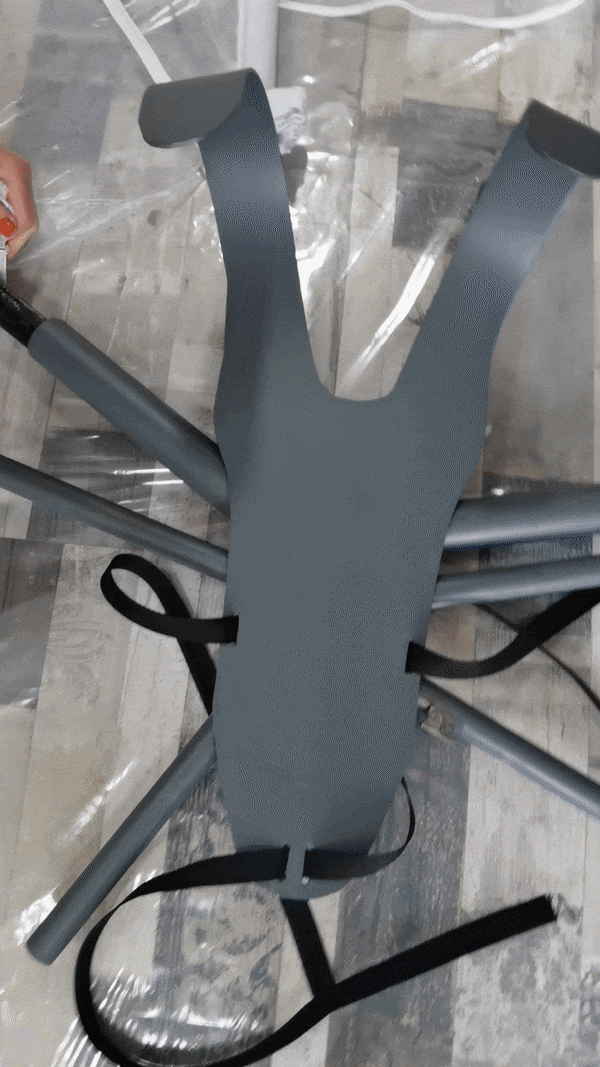
Attaching the wing to the backpack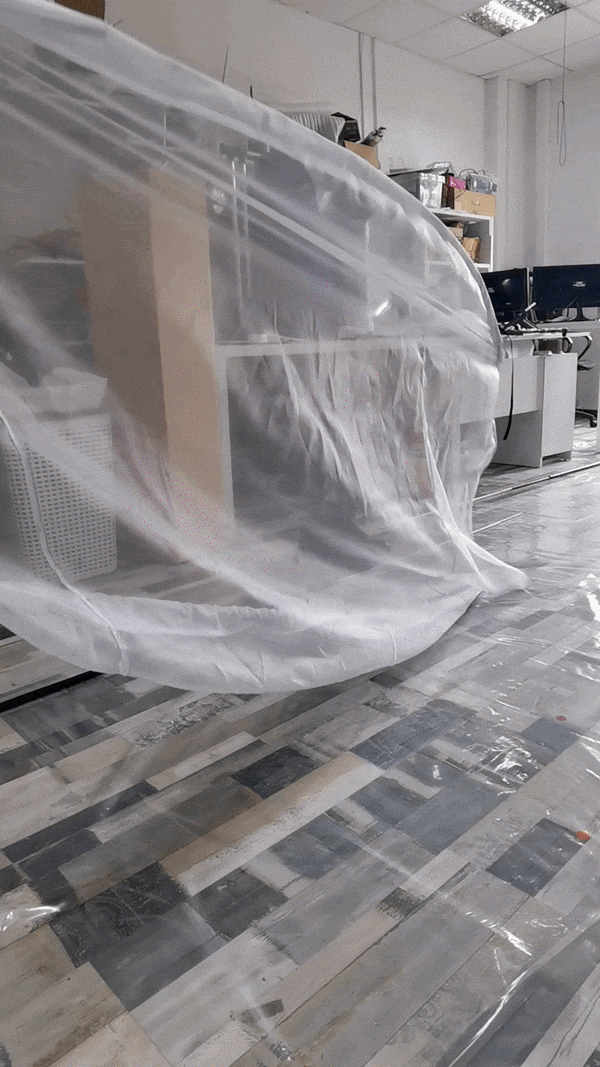
Shaping the left half of the wing
When we made all the necessary adjustments, we sent the second half to print and then sewed it off.
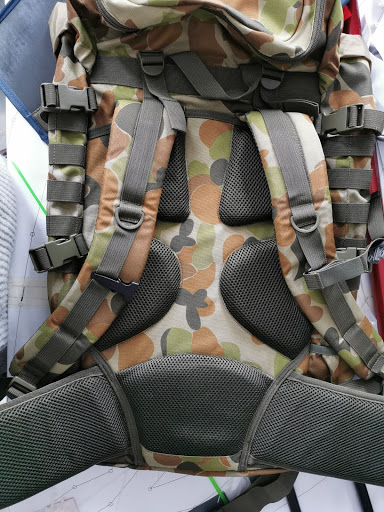
The next step for us was to create a cover for a metal backpack. First, bare metal looked ugly. Secondly, it was not enough for optimal fixation on the human body.
We used a military backpack as a cover for the first prototype. It fited optimally in design. Soft fabric, harnesses, belt relief and fasteners made the design comfortable for a person wearing the costume.
Backpack that we used for the base 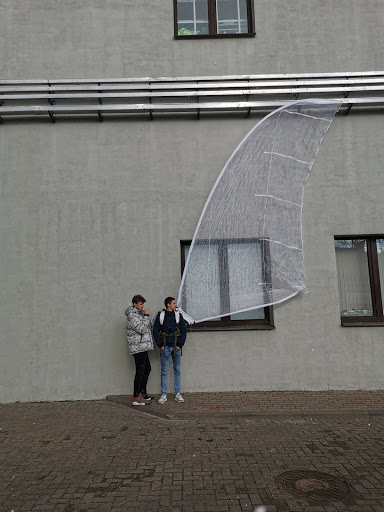
Fitting the wing with a backpack
The base itself is the fabric part of the backpack, which is worn on a metal frame. Tubes extend from it, where fishing rods and flagpoles are inserted to shape the wing. They are fastened with metal clasps. Also on the backpack there are pockets for boxes with batteries and a controller.
Soldered the common wire and glued the LED strips
At the same time, we sent the LED strips to the production department for soldering. The fact is that initially the connectors on the tapes are large and ugly. We have reduced their size.

After the tapes were soldered, the wings were given for gluing with the LED tapes. As soon as the lower part of the wing was glued, we began to solder the common wire. It is needed in order to connect and power the entire product together.
The common wire is of a tree shape. Thin wires extend from the thick base to distribute energy evenly throughout the wing. After the common wire was soldered, we began to attach it to the wings.
We manually positioned LEDs in Madrix for smooth operation
Along with the work on the creation of the common wire, one of the most difficult processes began – the creation of the LED map in Madrix. This is necessary so that the LEDs light up in a certain order, according to how the wire goes, and the resulting picture to be even and smooth.
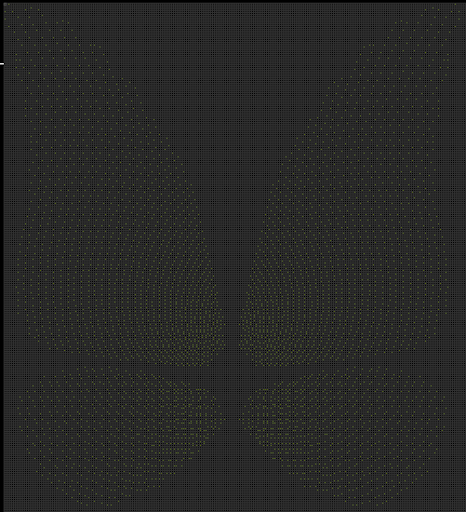
To do this, our programmer made a mathematical grid in TouchDesigner, and after three days manually placed each LED on it in Madrix.
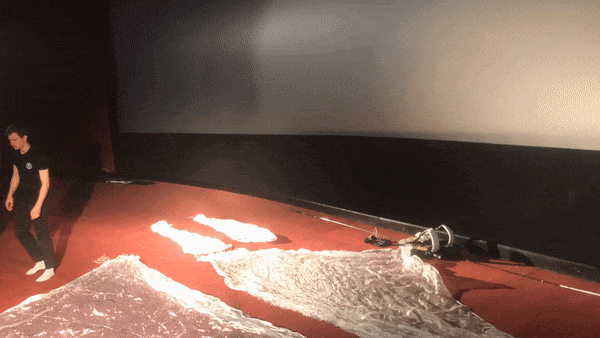
We did the first shot with effects
When all four wings were all completely ready, we collected everything all together, connected it and carried it out into the street. And again there was a problem with rods and shape: the rods did not fit, they could not withstand the entire load, the shape of a butterfly turned into spaniel ears.
Running the effects for the first time 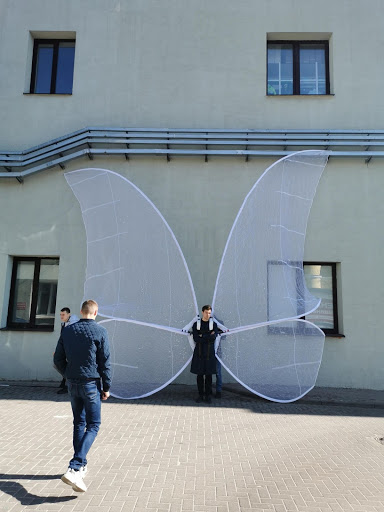
Assembled the costume 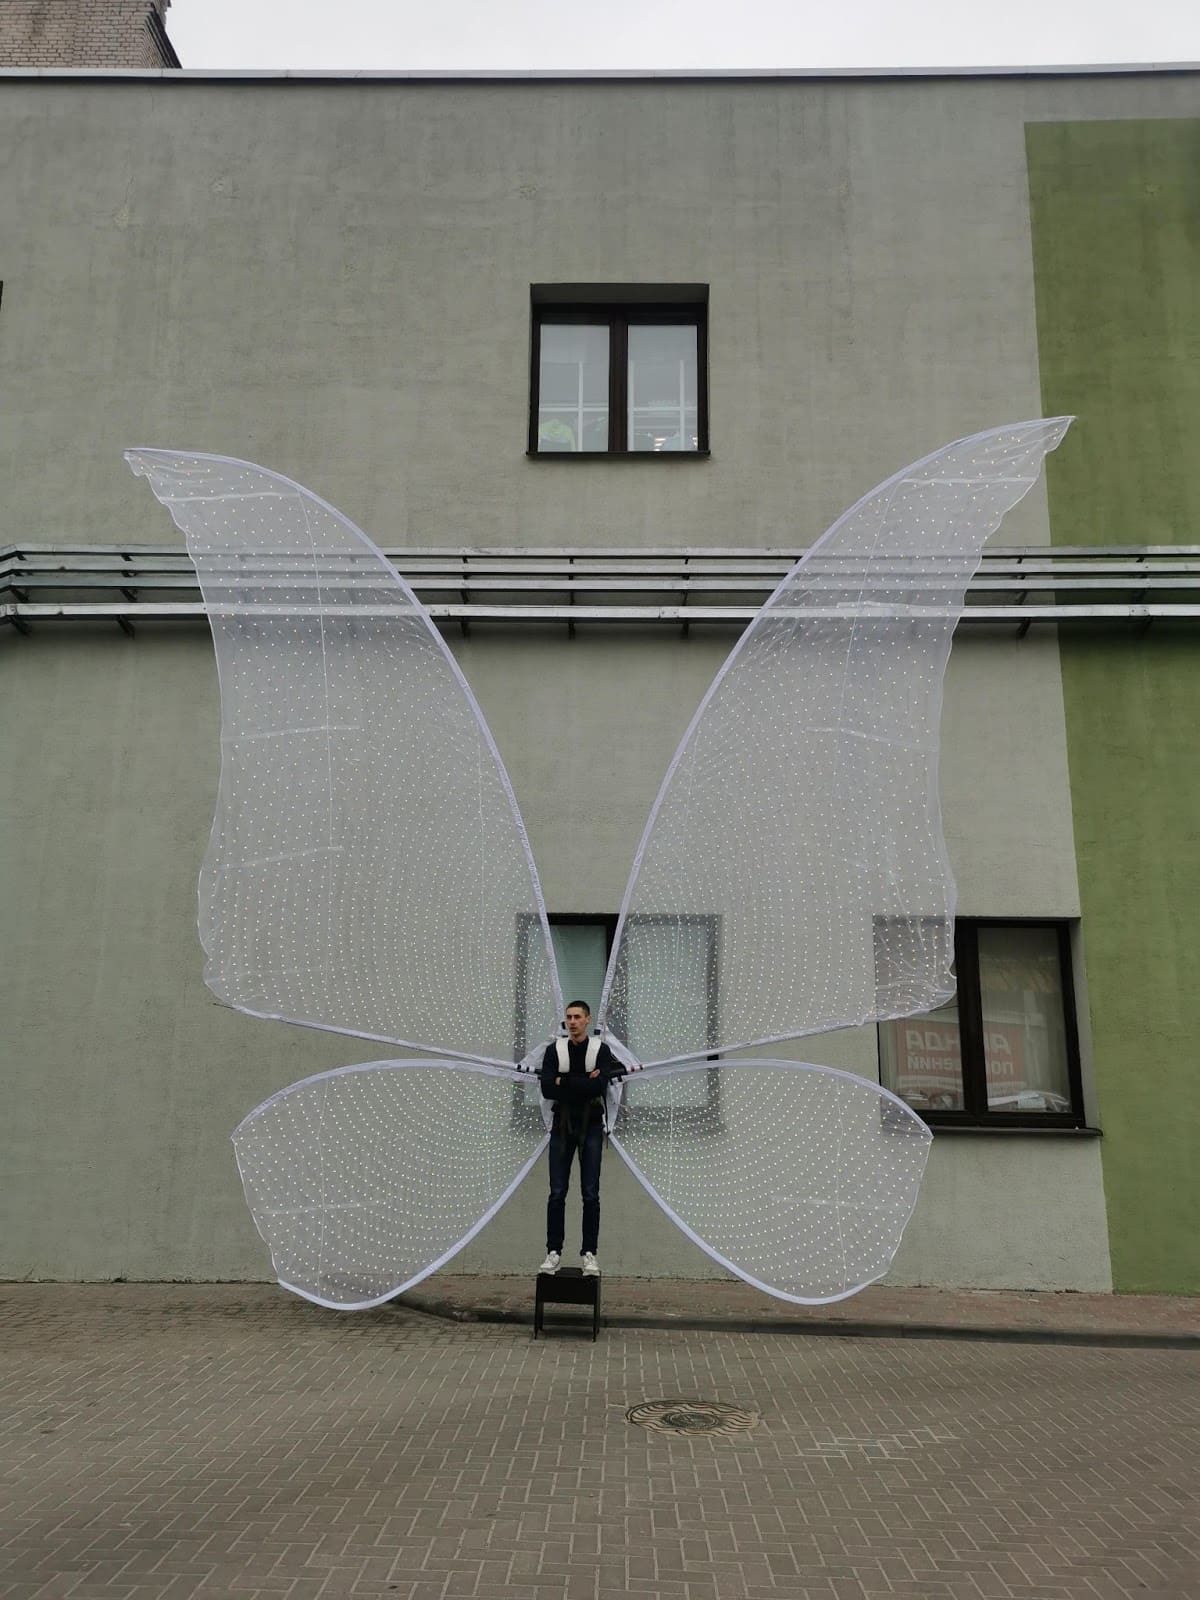
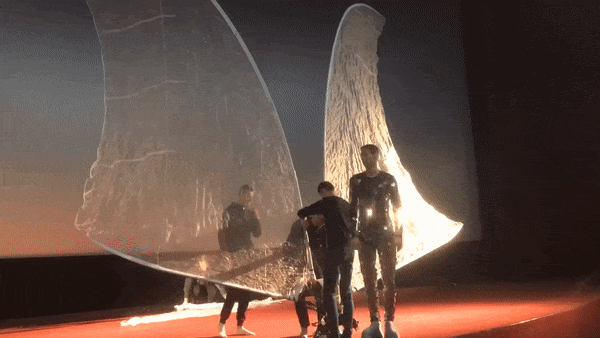
Corrected the shape of the wings
With the purchase of new, durable fishing rods, it turned possible to create the perfect shape. After that, we began preparing for the first shooting. Here, also not everything went smoothly: the LEDs were out of order and had to be replaced.
We have selected the following effects for shooting:
- 50% black. With it, you can see the dynamics and capabilities of the product.
- Effect in rainbow colors.
- Text displaying on the wings.
- Displaying of the logo on the wings.
- Displaying of the flag on the wings.
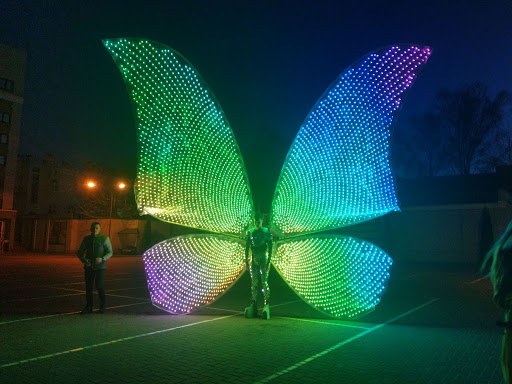
Photo from the test shooting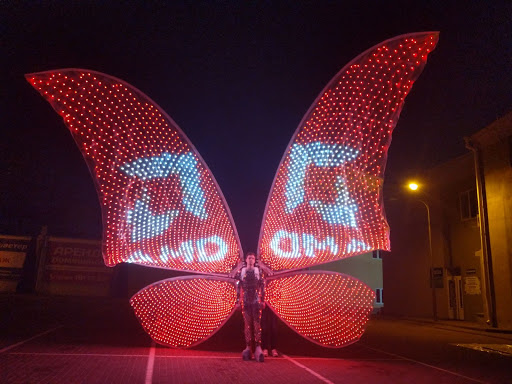
Any logo can be displayed on the wings
Outputting text to the wing of the suit
Effects are very easy to manage. They are pre-recorded on a USB flash drive that is inserted into the controller. Effects are switched using two buttons: forward and backward.
What programs does work with the suit?
To work on a PC, you can use Madrix 3. Despite the fact that the version of the program is outdated and shareware (you can record effects up to a minute), many of our clients create and record effects in it. We provide a copy of the program, instructions and software for recording effects.
For those who knows how to create video effects, we offer our Screen recorder software for recording effects. Due to it, you can record a video effect directly from your monitor screen.
You can read more about how to work with Screen Recorder here.
It works as follows: the program window captures the required area of the screen and then converts it into an effect. After that, it can be copied to a USB flash drive, connected to a controller and the effect will appear on the suit.
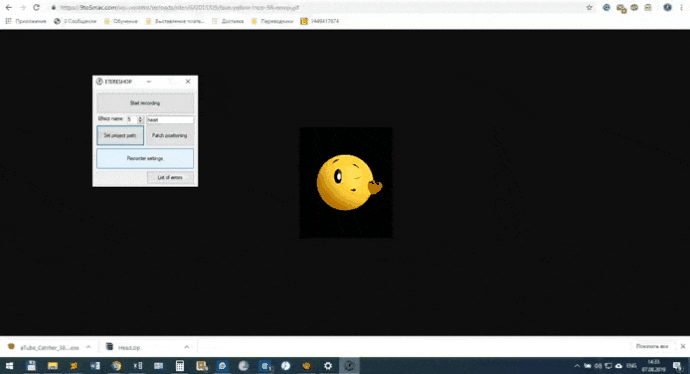
Recording mask effect with Screen Recorder 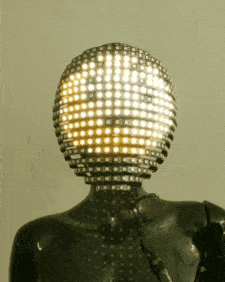
Effect on the mask
We also provide our Show Maker program; thanks to which you can create playlists of effects. Here’s how it works: you create a playlist in the program (it is possible to set time codes with effect numbers), copy the file created by the program to the SD card and insert it into the controller.
For convenience, Show Maker has a built-in audio player. If you have a musical performance, you can place timestamps with a single button. Then they can be edited.
You can purchase a USB controller for the program, with which you can run the compiled playlist from your PC. It is displayed on the suit using a radio signal. In this case, the switching of the costume effects takes place via a radio signal from the transmitter.
In addition, our development is compatible not only with the above mentioned programs, but also works with Jinx!, Resolume, etc.
How is the costume constructing?
Despite the scale, the assembled carnival costume of the butterfly fits into two bags 1.2 meters long (one for the frame and one for the fabric). The fishing rods fold up to 1.5 meters in a carry bag and take up little space.
The weight of the carnival costume is about 20 kilograms, 10 of which is a backpack. However, it will take two people and 30 minutes of your time to assemble the entire carnival suit.
How do the effects work?
To work with effects, you need a controller with a button to switch them. Pre-recorded effects on a USB flash drive are inserted into the controller and switched using the forward and backward buttons.
Any drawing, logo or picture can be displayed on the wings of the suit.
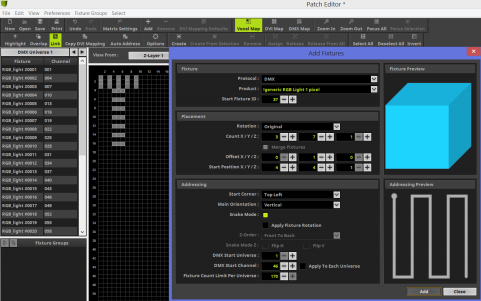
If you want to control the effects in real time, there is no problem. Using the ArtNet control protocol, they can be switched to a PC in real time via WiFi or LAN via Madrix, Resolume, etc.
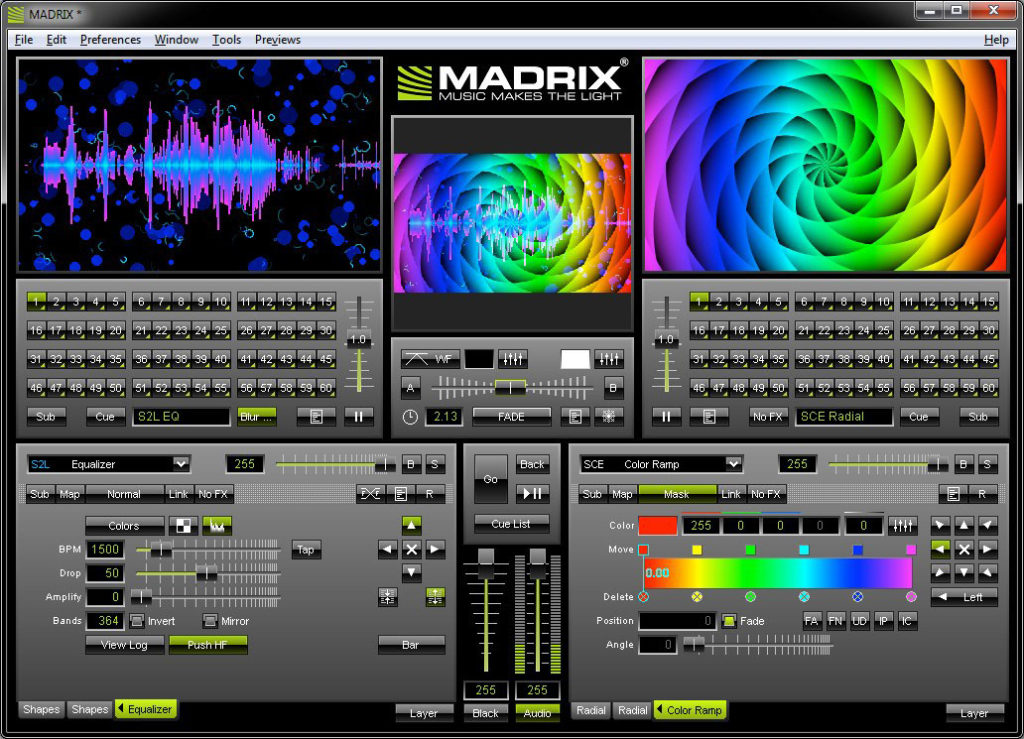
Madrix working panel 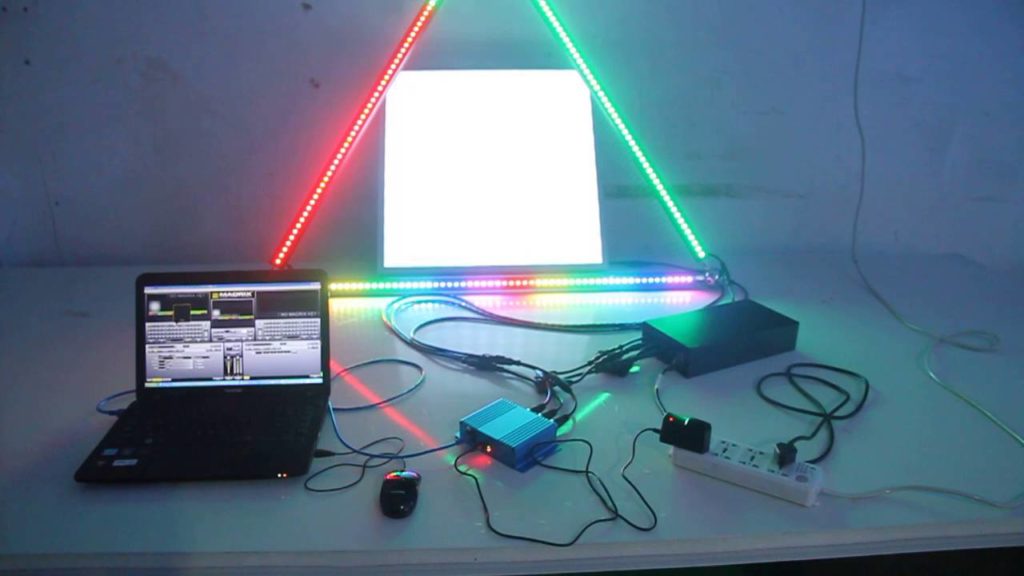
Effects controlling via Madrix
Here’s how it works: you connect a computer and a controller with the ArtNet control protocol via WiFi or LAN into a single local network and control the effects in real time through the program. This solution is perfect for synchronizing music with effects.
We recommend to use DMX-Radio transmitters to control products on large stages. On large stages, as practice shows, there is a bad WiFi signal, so the most reliable option for this issue would be to work with the pre-recorded the costume effects. In this case, you can switch the costume effects using the DMX console.

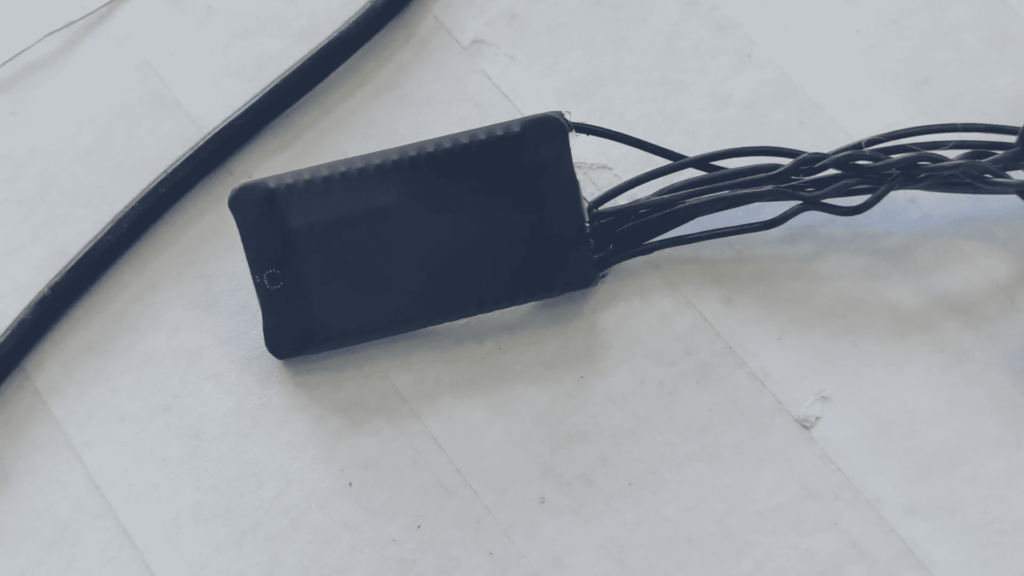
A micro SD memory card is inserted into the DMX controller. It contains a file with the number of the console channel that will operate the suit. The transmitter is powered by an external battery.
The suit controller is configured the same way: files indicating the radio channel are installed onto the memory card. Then you can switch the effects by simply using the DMX console.You can also add sound control of the effects if you wish.
Due to the built-in microphone in the controller, the LEDs respond to sound and change the brightness and playback speed.
The autonomous operation of the suit on the recorded effects is one hour. This time can be increased if you use effects that contain a lot of black gaps (do not fill the entire wing area) or turn on only one of the LED colors (red, blue or green). Also in the controller settings, you can reduce the maximum brightness level.
Also, the suits perfectly synchronize with each other. With one controller, you can switch effects on multiple costumes using the radio signal.
How are we going to work next?
We are not resting on our laurels and are currently engaged in the optimization of the suit. The plans are to make the carnival costume more mobile by means of wheels fastened to the wings. This will reduce the load on the person, and the suit itself will become more mobile and easier to move.

The problems we faced
• A backpack made of too thin metal. The original version of the backpack was made of 1.5 mm metal. The structure sagged under the weight of the product and we had to redo the frame for a more durable one. As a result, we made a base of metal with a thickness of 3.5 mm and sheathed it with a base from a travel backpack.
• Constantly breaking fishing rods. They broke at every stage of assembly and attempts to shape the wings. In addition to this we had to reinforce the ends of the rods to get the shape we needed. Each time we went through several options for fishing rods and in the end we chose the most durable ones. Moreover, we do not exclude force majeure when assembling a suit, so we put a spare set of fishing rods in each set.
Specifications
Amount of LEDs: 4300
Density of LEDs on a LED strip: 1 LED per each 10 cm (4 inches)
Size (unfolded): 6*6,5 meters (19,6*19,6 feet)
Operating time: approx. 1 hour and more
Working mode: stand-alone, remote control via a PC, ArtNet, DMX switching
Batteries: 20 pieces of Li-ion 18650, 3.7 v, No less than 10 A, 3000 Mah, Flat top *not included in the se
Colors: multicolor
How to switch effects: with the help of two small buttons (forward/backward)
Light effects: effects are uploaded to an SD card with the help of our program called Screen Recorder or via ArtNet recorder (with ArtNet software)
Synchronization with music: available
Sound activation: available
Synchronization with other controllers: available